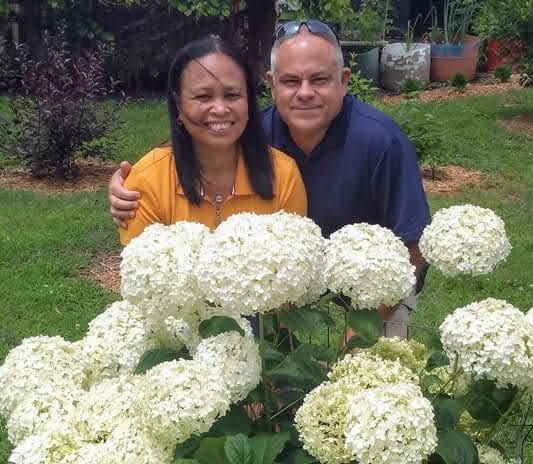
Learning how to choose the right hydrangea can save you a lot of frustration later. The best hydrangea for your yard depends on how much sun the area gets, how much space you have, your climate, and the amount of care you want to give the plant. Choosing the right variety from the start makes it much easier to get healthy growth and plenty of blooms.
The trouble usually starts when someone falls in love with a hydrangea at the nursery, brings it home, and plants it in the first empty spot they see.
I understand. Those blooms will talk you into making decisions in a hurry.
Quick Answer: How Do You Choose the Right Hydrangea?
Choose a hydrangea based on how much sun the area receives, how large the plant will grow, your climate, and how much care you want to provide. Panicle hydrangeas usually handle more sun, while bigleaf hydrangeas often prefer morning sun and afternoon shade. Giving the plant the right location from the beginning makes watering, pruning, and blooming much easier.
Before you buy, it helps to slow down and do a little planning. Choosing the right location and the right type of hydrangea can make the difference bet
Let’s walk through the entire process, starting with the most important question: where are you going to plant it?
About Bobby & Lynn


Start by Picking the Right Spot in Your Yard
Before you visit the nursery, take a good look at the area where you want to plant your hydrangea.
Don’t judge the spot by how much sun it receives during one quick glance. Watch it throughout the day if you can.
Ask yourself:
- Does the area receive morning sun?
- Is it shaded during the hottest part of the afternoon?
- Does it receive strong afternoon sun?
- Does water collect there after heavy rain?
- Is there enough space for a mature shrub?
- Is the area close enough to a water source?
Here in the South, morning sun and afternoon shade are often ideal for many hydrangeas. The morning light helps support healthy growth and blooming, while afternoon shade protects the leaves and flowers from our intense summer heat.
An area along the east side of the house can work especially well. The plant receives gentle morning sunlight and then gets some relief later in the day.
That doesn’t mean every hydrangea needs the same conditions. Some types can handle more sun than others, which is why choosing the right hydrangea matters just as much as choosing the right spot.
For more detailed guidance, see the University of Georgia Cooperative Extension’s recommendations for growing bigleaf hydrangeas, including advice on sunlight, planting depth, watering, and fertilizing.
Match the Hydrangea Type to Your Sunlight
Hydrangeas aren’t all the same. Different types have different sunlight needs, mature sizes, pruning requirements, and bloom habits.
Bigleaf Hydrangeas
Bigleaf hydrangeas include many of the familiar blue, pink, or purple mophead varieties.
These hydrangeas usually perform best with morning sun and afternoon shade, especially in hot Southern climates. Too much direct afternoon sun can lead to drooping, scorched leaves, faded blooms, and constant watering.
Bigleaf hydrangeas are often a good choice for planting near the east side of a house, under high tree cover, or in a location that receives filtered sunlight.
Panicle Hydrangeas
Panicle hydrangeas include popular varieties such as Limelight, Little Lime, Bobo, Phantom, and Pink Diamond.
These are generally the most sun-tolerant hydrangeas. They often bloom best with several hours of sunlight and can handle full sun better than most other types.
Even so, a panicle hydrangea planted in full Southern sun may need more water during hot, dry weather. A little afternoon protection can still be helpful.
Panicle hydrangeas bloom on new wood, which means they produce flowers on the growth they make during the current season.
Smooth Hydrangeas
Smooth hydrangeas include Annabelle and similar varieties.
They usually grow well in partial shade but can tolerate more sun when the soil stays evenly moist. In hotter areas, afternoon shade can help prevent wilting and leaf scorch.
Smooth hydrangeas also bloom on new wood.
Oakleaf Hydrangeas
Oakleaf hydrangeas are wonderful for woodland gardens and partially shaded areas.
They produce cone-shaped flowers, large oak-shaped leaves, beautiful fall color, and attractive peeling bark. They usually prefer morning sun, filtered light, or partial shade.
Oakleaf hydrangeas don’t like soggy soil, so good drainage is especially important.
Measure the Space Before You Go Shopping
Hydrangeas can be small and tidy, or they can become very large shrubs.
That little plant sitting in a nursery pot may eventually grow six, eight, or even ten feet wide. Don’t let the size of the container fool you.
Measure the planting area before visiting the nursery. Pay attention to nearby sidewalks, foundations, windows, fences, porches, and other plants.
Giving the hydrangea enough room to reach its mature size will save you from having to constantly prune it back or move it later.
It’s much easier to buy the right-sized plant than it is to convince a large hydrangea that it needs to remain small.
Visit a Local Nursery
Once you understand the sunlight, drainage, and available space, visit a reputable local nursery.
A local nursery can be especially helpful because the staff usually knows which hydrangeas perform well in your climate. They may also carry varieties that are better suited for your area than some of the plants shipped to large national retailers.
Bring your measurements with you. It’s also helpful to take a few pictures of the planting area on your phone.
Be prepared to explain how much sun the location receives, what time of day it receives that sun, and whether the soil stays wet or dries quickly.
Questions to Ask at the Nursery
Don’t be afraid to ask questions. A good nursery employee would rather help you choose the right plant now than have you return later with a struggling shrub.
Here are some useful questions to ask:
- How much sun does this hydrangea need in our area?
- Will it tolerate afternoon sun?
- What is its mature height and width?
- Does it bloom on old wood, new wood, or both?
- When should it be pruned?
- Is it a reblooming variety?
- How much water will it need after planting?
- Does it require well-drained soil?
- Is this variety known to have strong stems?
- Is it suitable for growing in a container?
- How cold-hardy is it?
- Is it likely to bloom reliably in our climate?
- Are there any common pest or disease problems with this variety?
You may also want to ask whether the flower color changes based on soil conditions. Some bigleaf hydrangeas can produce blue or purple flowers in more acidic soil and pink flowers in more alkaline soil.
White hydrangeas generally remain white, although their blooms may naturally turn green, cream, pink, or burgundy as they age.
How to Pick a Healthy Hydrangea
Once you’ve found the right variety, take a few minutes to inspect the plant before buying it.
Look for a hydrangea with healthy leaves, sturdy stems, and growth around the entire plant.
Avoid plants with:
- Large numbers of yellow leaves
- Black or brown leaf spots covering the plant
- Wilted stems that don’t recover
- Broken branches
- Mushy areas near the base
- Heavy insect activity
- Roots circling thickly around the outside of the pot
- A sour or rotten smell coming from the soil
A few damaged leaves aren’t always a reason to reject a plant. Nursery plants get handled, moved, watered, and exposed to changing weather. Just make sure the overall plant looks healthy.
You also don’t have to choose the hydrangea with the most flowers. A plant covered in blooms may look impressive, but a smaller plant with healthy roots and good branching can establish just as well or better.
Prepare the Planting Hole Correctly
When you get home, water the hydrangea in its nursery pot if the soil feels dry.
Choose a day when the weather is mild if possible. Planting early in the morning or later in the afternoon can reduce stress, especially during warm weather.
Dig the planting hole two to three times wider than the root ball, but no deeper than the root ball itself.
This is important.
Planting too deeply can cause the roots and lower stems to stay too wet. The top of the root ball should sit level with the surrounding ground or slightly above it.
A wide hole loosens the surrounding soil and gives the roots room to spread outward.
Check the Roots Before Planting
Carefully remove the hydrangea from the nursery pot.
If the root ball holds the shape of the container and the roots are circling around the outside, gently loosen them with your fingers.
For severely root-bound plants, you may need to make a few shallow vertical cuts along the sides of the root ball. This can encourage the roots to grow outward into the surrounding soil instead of continuing to circle.
Be gentle, but don’t be afraid to loosen tight roots. A plant with circling roots may struggle to establish even after it’s placed in the ground.
Should You Add Soil Amendments?
This is where many gardeners overcomplicate things.
In most cases, it’s best to backfill the hole mainly with the soil you removed. If you completely replace the native soil with rich compost or bagged garden soil, the roots may stay inside the soft planting hole instead of spreading into the surrounding ground.
That can also create a bowl that holds too much water.
If your soil is extremely poor, hard, or lacking organic matter, you can mix a modest amount of compost into the native soil. The goal is to improve the soil without creating a completely different pocket around the roots.
For heavy clay soil, don’t fill the hole with sand. Mixing small amounts of sand into clay can sometimes create an even harder texture.
Instead, focus on planting slightly high, improving drainage, and adding organic matter across a wider area over time.
If water sits in the planting hole for hours, the location may not be suitable for a hydrangea unless drainage is corrected.
Planting the Hydrangea
Set the hydrangea in the center of the hole.
Step back and look at it from several directions. Make sure the plant is upright and positioned the way you want it before filling the hole.
Backfill around the root ball using the soil you removed. Gently press the soil into place with your hands to remove large air pockets, but don’t pack it down tightly.
Once the hole is filled, water the plant deeply.
The water will help settle the soil around the roots. Add a little more soil if the ground sinks, but keep the top of the root ball uncovered.
Don’t Rush to Fertilize
A newly planted hydrangea usually doesn’t need a heavy application of fertilizer.
Too much fertilizer can encourage fast, weak growth and may stress newly establishing roots. It can also reduce blooming if the fertilizer contains too much nitrogen.
Unless a soil test shows a specific deficiency, give the plant time to settle in before feeding it.
Established hydrangeas may benefit from a balanced, slow-release fertilizer applied according to the label directions. Early spring is often a good time to fertilize as new growth begins.
Some reblooming varieties may benefit from a light second feeding, but avoid fertilizing late in the growing season. Late fertilizer can encourage tender new growth that may be damaged by cold weather.
More fertilizer doesn’t mean more flowers. Sometimes it just means more leaves.
Add Mulch the Right Way
Spread two to three inches of mulch around the hydrangea.
Mulch helps hold moisture, reduce weeds, protect the roots from temperature swings, and improve the soil as it breaks down.
Pine bark, pine straw, shredded hardwood, and leaf mulch can all work well.
Keep the mulch a few inches away from the main stems. Don’t pile it directly against the base of the plant.
Mulch volcanoes may be common in landscaping, but plants don’t appreciate them.
Watering a Newly Planted Hydrangea
New hydrangeas need consistent moisture while their roots are becoming established.
Water deeply at the base of the plant rather than giving it a light sprinkle every day. Deep watering encourages the roots to grow down into the soil.
Check the soil before watering. Push your finger a few inches into the ground near the root ball.
If the soil feels dry, it’s time to water. If it still feels moist, check it again later.
During the first growing season, you may need to water several times a week during hot or dry weather. The exact schedule will depend on your soil, rainfall, sunlight, and temperature.
Hydrangeas may droop during the hottest part of the afternoon even when the soil is moist. Check the soil before automatically reaching for the hose.
If the plant perks back up in the evening, it may simply be reacting to heat. If it remains wilted in the morning, it may truly need water.
Common Hydrangea Pests
Hydrangeas are fairly dependable shrubs, but they can occasionally have pest problems.
Aphids
Aphids are small, soft-bodied insects that gather on tender stems and new leaves. They may cause curled leaves and leave behind a sticky substance called honeydew.
A strong spray of water is often enough to knock them off. Insecticidal soap can also be used when needed. Be sure to follow the product label and spray both the tops and undersides of the leaves.
Spider Mites
Spider mites are tiny pests that are more common during hot, dry weather.
Signs include stippled or faded leaves, fine webbing, and leaves that look dusty or bronzed.
Rinsing the foliage and improving watering conditions may help. Insecticidal soap or horticultural oil may also be used according to the label.
Avoid spraying oils during extreme heat, because they can damage the leaves.
Japanese Beetles
Japanese beetles can chew holes through hydrangea leaves and flowers.
For a small number of beetles, the easiest control is often to knock them into a container of soapy water early in the morning when they’re less active.
Be cautious with broad insecticides, especially while plants are blooming, because they may also harm bees and other beneficial insects.
Scale Insects
Scale insects may appear as small bumps along the stems or undersides of leaves.
Light infestations can sometimes be removed by hand. Horticultural oil can help control certain types of scale when applied at the correct time.
Because scale insects can be difficult to identify, take a close-up picture or a sample to your local extension office or nursery before treating.
Common Hydrangea Diseases
Many hydrangea disease problems are made worse by wet foliage, poor airflow, crowded planting, and overhead watering.
Leaf Spot
Cercospora leaf spot and other fungal leaf spots can cause purple, brown, or black spots on the leaves.
The spots often begin on lower leaves and become more noticeable later in the growing season.
Remove fallen leaves, avoid overhead watering, and improve airflow around the plant. Water near the base and avoid wetting the foliage late in the day.
Fungicides may help protect healthy leaves, but they usually won’t repair leaves that are already spotted. Always follow the product label.
A small amount of leaf spot late in the season is often more cosmetic than dangerous.
Powdery Mildew
Powdery mildew looks like a white or gray powder on the surface of the leaves.
It’s more likely when air circulation is poor and humidity is high.
Thin crowded growth if needed, avoid planting hydrangeas too close together, and water at the base. Horticultural oils or fungicides labeled for powdery mildew may help when applied early.
Botrytis Blight
Botrytis can cause brown spots on flowers, gray fuzzy growth, and rotting blooms during cool, damp weather.
Remove affected flowers and plant material. Avoid overhead watering and clean up fallen petals around the plant.
Crowded, wet flowers are more likely to develop this problem.
Root Rot
Root rot is one of the most serious hydrangea problems, and it usually begins with poor drainage or overwatering.
A plant with root rot may wilt even though the soil is wet. Leaves may turn yellow, stems may decline, and the roots may become dark and mushy.
There usually isn’t a simple spray that will fix severe root rot. Prevention is the best treatment.
Plant hydrangeas in well-drained soil, avoid planting too deeply, and don’t water on a fixed schedule without checking the soil first.
Give Your Hydrangea Time to Settle In
A newly planted hydrangea may look a little stressed at first, especially if it was planted during warm weather.
It may droop, lose a few leaves, or pause its growth while the roots adjust to their new surroundings.
That doesn’t always mean something is wrong.
Keep the soil evenly moist, maintain a layer of mulch, and avoid overfertilizing. Watch the plant, but don’t keep digging it up to check the roots.
Hydrangeas usually need a little time to settle in.
The Right Hydrangea in the Right Place
Growing beautiful hydrangeas isn’t about finding a secret fertilizer or watering them every time they droop.
It starts with choosing the right type for the sunlight you have, giving it enough room, planting it correctly, and paying attention to the soil.
Take your time before you buy. Ask questions at the nursery. Check the roots. Dig a wide hole, plant at the correct depth, mulch properly, and water based on what the soil is telling you.
When a hydrangea is planted in the right place from the beginning, caring for it becomes much easier.
And a few years from now, when that shrub is covered in blooms, you’ll be glad you took the time to do it right.
Need More Hydrangea Help?
Still have questions about your hydrangea? Visit our Hydrangea Help page for practical guides on pruning, watering, fertilizing, blooming problems, brown leaves, drooping flowers, and more.
Whether you’re trying to identify your hydrangea or figure out why it isn’t blooming, we’ll help you find the right information without making things more complicated than they need to be.