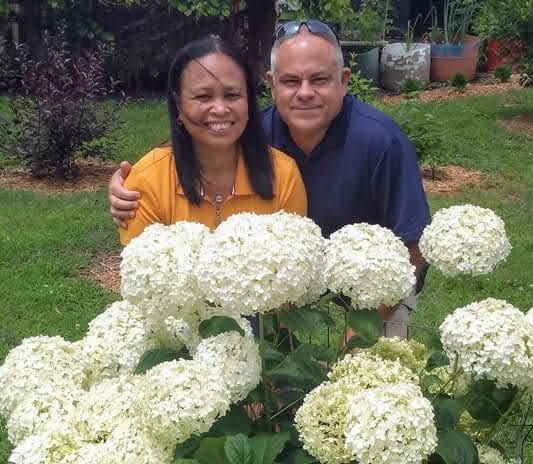
A pollinator garden is one of the best ways to bring more life into your yard. Bees, butterflies, hummingbirds, moths, and other helpful insects all depend on flowers for food, shelter, and places to rest.
The good news is you don’t need a huge yard to make a difference. A small flower bed, a sunny corner, a few containers, or even one section along a fence can become a pollinator-friendly space.
At Bobby & Lynn’s Plant Farm, we like gardens that are pretty, practical, and useful. A pollinator garden checks all three boxes.
Quick Answer
To create a pollinator garden, choose a sunny spot, plant flowers that bloom from spring through fall, include native plants, group the same plants together, provide shallow water, and avoid spraying flowers with insecticides. Leave some stems, seed heads, and small areas of bare soil so pollinators have places to feed, nest, and overwinter.

About Bobby & Lynn

What Is a Pollinator Garden?
A pollinator garden is a planted area designed to attract and support pollinators.
Pollinators visit flowers for nectar and pollen. While they move from bloom to bloom, they help plants produce seeds, fruit, and more flowers.
Common pollinators include:
- Bees
- Butterflies
- Hummingbirds
- Moths
- Beetles
- Beneficial insects
A good pollinator garden gives them food, shelter, water, and a safer place to visit.
Step 1: Pick the Right Location
Start by choosing a spot that gets plenty of sunlight.
Most pollinator plants bloom best with at least 6 hours of sun per day. You can still create a pollinator garden in part sun, but your plant choices may be a little different.
Look for an area that is:
- Easy to water
- Not too far from the house
- Protected from heavy foot traffic
- Away from areas that get sprayed with chemicals
- Large enough for plants to spread a little
You don’t have to start big. A 4-foot by 6-foot bed is enough to get started.
Step 2: Choose Plants That Bloom at Different Times
This is one of the most important parts of a pollinator garden.
You want something blooming in spring, summer, and fall so pollinators have food through the growing season.
A simple planting plan could look like this:
Spring Bloomers
- Columbine
- Phlox
- Salvia
- Yarrow
- Coreopsis
Summer Bloomers
- Bee balm
- Black-eyed Susan
- Coneflower
- Liatris
- Milkweed
- Zinnia
Fall Bloomers
- Aster
- Goldenrod
- Sedum
- Sunflower
- Joe Pye weed
Try to mix flower shapes, colors, and bloom times. Different pollinators like different flowers, so variety helps.
Step 3: Add Native Plants When You Can
Native plants are especially helpful because local pollinators are already used to them.
For Georgia and Southern yards, good pollinator-friendly plants to consider include:
- Bee balm
- Black-eyed Susan
- Purple coneflower
- Milkweed
- Mountain mint
- Phlox
- Aster
- Goldenrod
- Liatris
- Columbine
- Native sunflowers
You don’t have to make the whole garden native overnight. Start with a few strong plants and build from there.
The State Botanical Garden of Georgia’s Pollinator Plants of the Year program is a helpful place to find plants that support pollinators and perform well in Georgia gardens.
Step 4: Plant in Groups Instead of One Here and One There
Pollinators can find flowers easier when they are planted in groups.
Instead of planting one bee balm, one coneflower, one black-eyed Susan, and one salvia all scattered around, plant three or more of the same plant together.
This creates a bigger color target for bees, butterflies, and hummingbirds.
A simple layout could be:
- Taller plants in the back
- Medium plants in the middle
- Shorter plants in the front
- Repeated flower colors throughout the bed
This makes the garden look more natural and easier to care for.
Step 5: Prepare the Soil
Before planting, loosen the soil and remove weeds.
Most pollinator plants don’t need fancy soil, but they do need soil that drains well. If your soil is heavy clay, mix in compost to improve texture.
Most pollinator plants don’t need rich soil, but they do need conditions that fit the plant. Check how well the area drains before adding amendments. If you’re dealing with heavy Georgia clay, choose plants that tolerate your conditions and use compost only when it will actually improve the planting area rather than automatically amending every hole.
Don’t overdo fertilizer. Too much fertilizer can cause lots of leafy growth and fewer flowers.
A good basic soil prep plan:
- Remove weeds and grass.
- Loosen the soil.
- Add compost if needed.
- Smooth the bed.
- Water the area before planting if the soil is very dry.
Step 6: Plant With Mature Size in Mind
This is where a lot of gardeners get in trouble.
Small plants don’t stay small.
Before planting, check the mature height and width of each plant. Give them enough room so they don’t crowd each other later.
Crowded plants can lead to:
- Poor airflow
- More disease issues
- Weak growth
- Fewer blooms
- A messy-looking garden
It may look a little empty at first, but that’s normal. Plants need room to grow.
Step 7: Add a Water Source
Pollinators need water too.
You don’t need anything fancy. A shallow dish with small rocks works well. The rocks give bees and butterflies a place to land without falling into deep water.
Good water options include:
- A shallow saucer with pebbles
- A small bird bath
- A shallow bowl near the garden
- A damp sandy spot
Change the water often so it stays clean and doesn’t become a mosquito problem. If you want to make a simple drinking area, our guide to creating a pollinator watering station for bees and butterflies shows how to do it with a shallow container and safe landing spots.
Step 8: Mulch the Garden Bed
Mulch helps hold moisture, cool the soil, and reduce weeds.
Add a light layer around the plants, but don’t pile mulch right against the stems.
For a pollinator garden, you can also leave a few small open soil areas. Some native bees nest in the ground, so every inch doesn’t have to be covered.
A good mulch depth is usually around 2 inches.
Step 9: Avoid Spraying Blooms
This is a big one.
If your goal is to help pollinators, be careful with insecticides. Many sprays can harm bees, butterflies, and other beneficial insects, especially when sprayed directly on blooms.
If you have a pest problem, try to identify the pest first before spraying anything.
Better options include:
- Hand-picking pests when possible
- Spraying water to knock off aphids
- Removing badly damaged leaves
- Encouraging beneficial insects
- Avoiding sprays while plants are blooming
A pollinator garden doesn’t have to be perfect. A few chewed leaves are part of a living garden.
Step 10: Keep Something Standing Through Winter
It’s tempting to clean up every dead stem in fall, but some pollinators use old stems, leaves, and garden debris for shelter.
You can still keep the garden tidy, but consider leaving some seed heads and stems through winter.
This can help:
- Birds find seeds
- Beneficial insects overwinter
- Bees use hollow or pithy stems
- The garden provide winter interest
In early spring, you can clean up what needs to be removed before new growth gets going.
Easy Pollinator Garden Layout for Beginners
Here’s a simple layout idea for a sunny garden bed:
Back Row
- Joe Pye weed
- Sunflowers
- Tall phlox
- Goldenrod
Middle Row
- Bee balm
- Coneflower
- Black-eyed Susan
- Liatris
Front Row
- Yarrow
- Coreopsis
- Sedum
- Short salvia
This gives you height, color, and blooms across the season.
Best Pollinator Plants for Beginners
If you’re just getting started, these are good beginner-friendly choices:
- Bee balm
- Black-eyed Susan
- Coneflower
- Zinnia
- Milkweed
- Liatris
- Salvia
- Coreopsis
- Yarrow
- Aster
- Goldenrod
- Sedum
Start with a few dependable plants first. You can always add more later.
Common Mistakes to Avoid
Planting Only One Bloom Season
If everything blooms in June, pollinators may not have much food in spring or fall. Try to include early, midseason, and late bloomers.
Using Too Many Chemicals
Avoid spraying flowers when pollinators are active. Even products that seem harmless can cause problems if used the wrong way.
Planting Too Far Apart
Pollinators notice flower groups better than single plants scattered all over the yard.
Forgetting About Water
A shallow water source can make your garden even more useful.
Cleaning Up Too Much in Fall
Leaving some seed heads and stems can help birds and overwintering insects.
Final Tips From the Plant Farm
A pollinator garden doesn’t have to be perfect to be helpful. Start small, plant flowers that bloom at different times, and choose plants that fit your sun, soil, and space.
The best pollinator gardens are full of life. You’ll see bees working the flowers, butterflies passing through, hummingbirds checking blooms, and birds enjoying the seeds later in the season.
And honestly, that’s what makes it fun.
You’re not just planting flowers. You’re building a little backyard habitat, one bloom at a time.