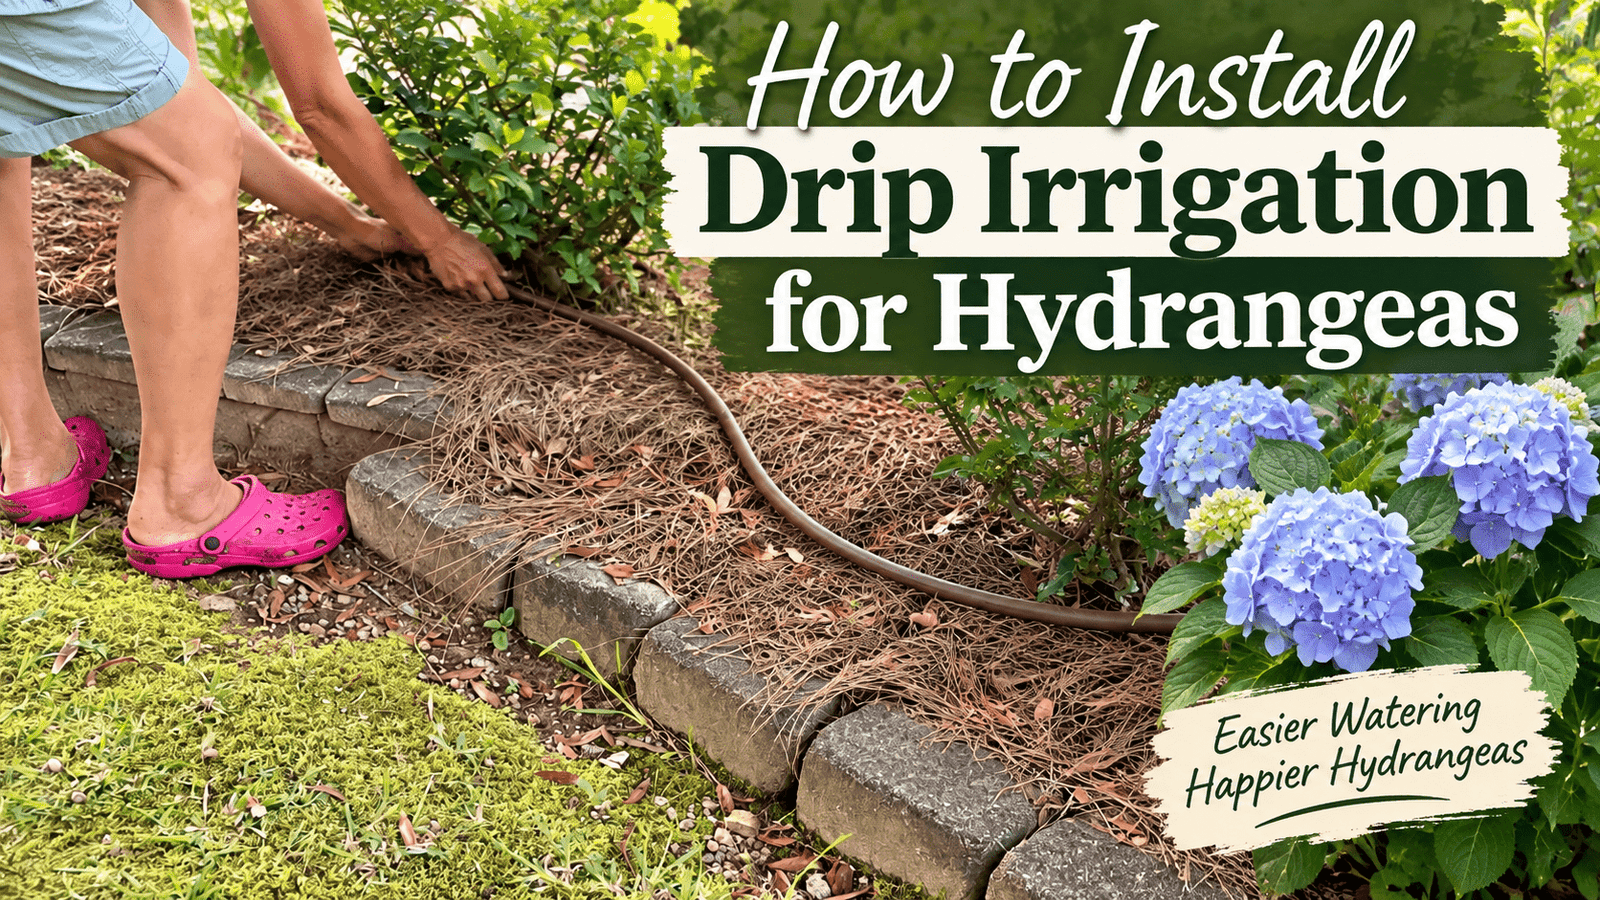
If you’re tired of dragging a hose around every time your hydrangeas need water, drip irrigation for hydrangeas can make the job a whole lot easier. We recently installed our own system here at Bobby & Lynn’s Plant Farm, and after laying it out ourselves, there are a few things we’d do exactly the same way again.
Quick Answer: Drip Irrigation for Hydrangeas
Drip irrigation works well for hydrangeas because it delivers water slowly near the root zone instead of spraying water across the leaves and surrounding area. Our biggest recommendation is to sketch your system on paper first, walk the area, count the parts you need, and then buy those pieces individually. Kits can be convenient, but we found buying only what we actually needed was more cost effective for our setup.
This post may contain affiliate links. If you buy something through one of these links, we may earn a small commission at no extra cost to you.
About Bobby & Lynn

Why We Installed Drip Irrigation for Our Hydrangeas
Hydrangeas like consistent moisture, especially during hot weather and while they’re getting established.
Here in Georgia, our summer weather can turn hot and dry pretty quickly. Add our heavy red clay soil into the mix, and watering can get interesting.
We wanted a drip irrigation for hydrangeas system that would let us water slowly at ground level without standing there holding a hose.
Drip irrigation also puts the water where we want it instead of watering half the yard along with the hydrangeas.
The University of Georgia Cooperative Extension recommends drip irrigation for shrubs, flower beds, and other landscape plants because it delivers water slowly near the roots while reducing evaporation and runoff.
For more help with watering, sunlight, pruning, and other hydrangea basics, see our Hydrangea Care Guide.
Don’t Buy Anything Until You Plan the System
This may be the most important thing we learned.
You can buy complete drip irrigation kits, and there’s nothing wrong with them. For some gardens, a kit might be the easiest way to get started.
That isn’t what worked best for us.
Before buying the parts, I sketched our system out on paper.
I looked at where the water source was located, where the tubing needed to run, where it needed to turn, and where each hydrangea would receive water.
Then I counted what we needed.
That included the tubing, tees, elbows, couplings, end caps, emitters, timer, splitter, and other connections.
By doing it this way, we bought the pieces our system actually needed instead of paying for a kit containing fittings we might never use.
My recommendation is simple: draw it first and buy it second.
A few minutes with a piece of paper can save you a trip back to the store and keep you from buying a pile of parts that wind up sitting on a shelf.
What We Used for Our Drip Irrigation System
We used Rain Bird parts for most of this installation. They worked well for us and were easy to find.
There was one exception.
I liked the Orbit elbows better than the Rain Bird elbows I tried, so those are what I chose for our system.
Here are the main pieces we used.
Faucet Connection
We used the Rain Bird Drip Irrigation Faucet Connection Kit.
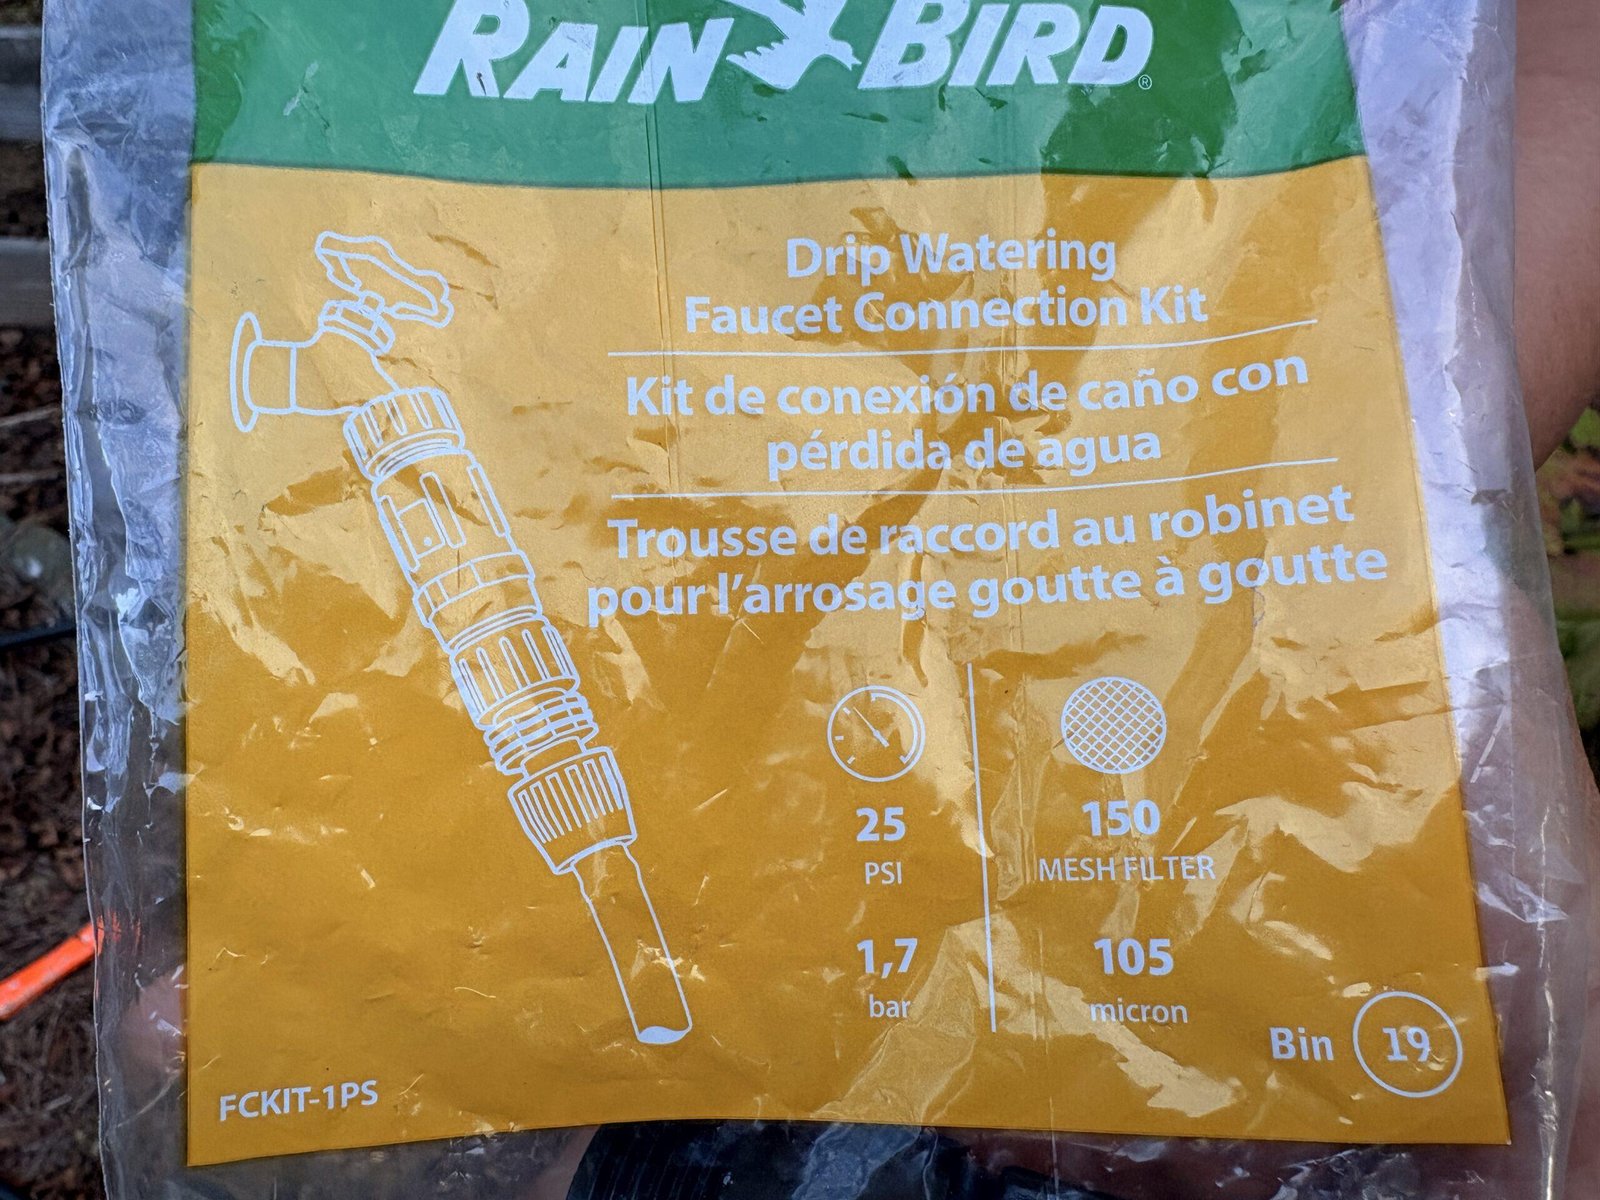
This connects the drip system to the water source and includes the backflow preventer, pressure reducer, and connection for the 1/2-inch tubing.
A pressure reducer is important because a drip system doesn’t need the same pressure you might want coming through a regular garden hose.
Hose Splitter
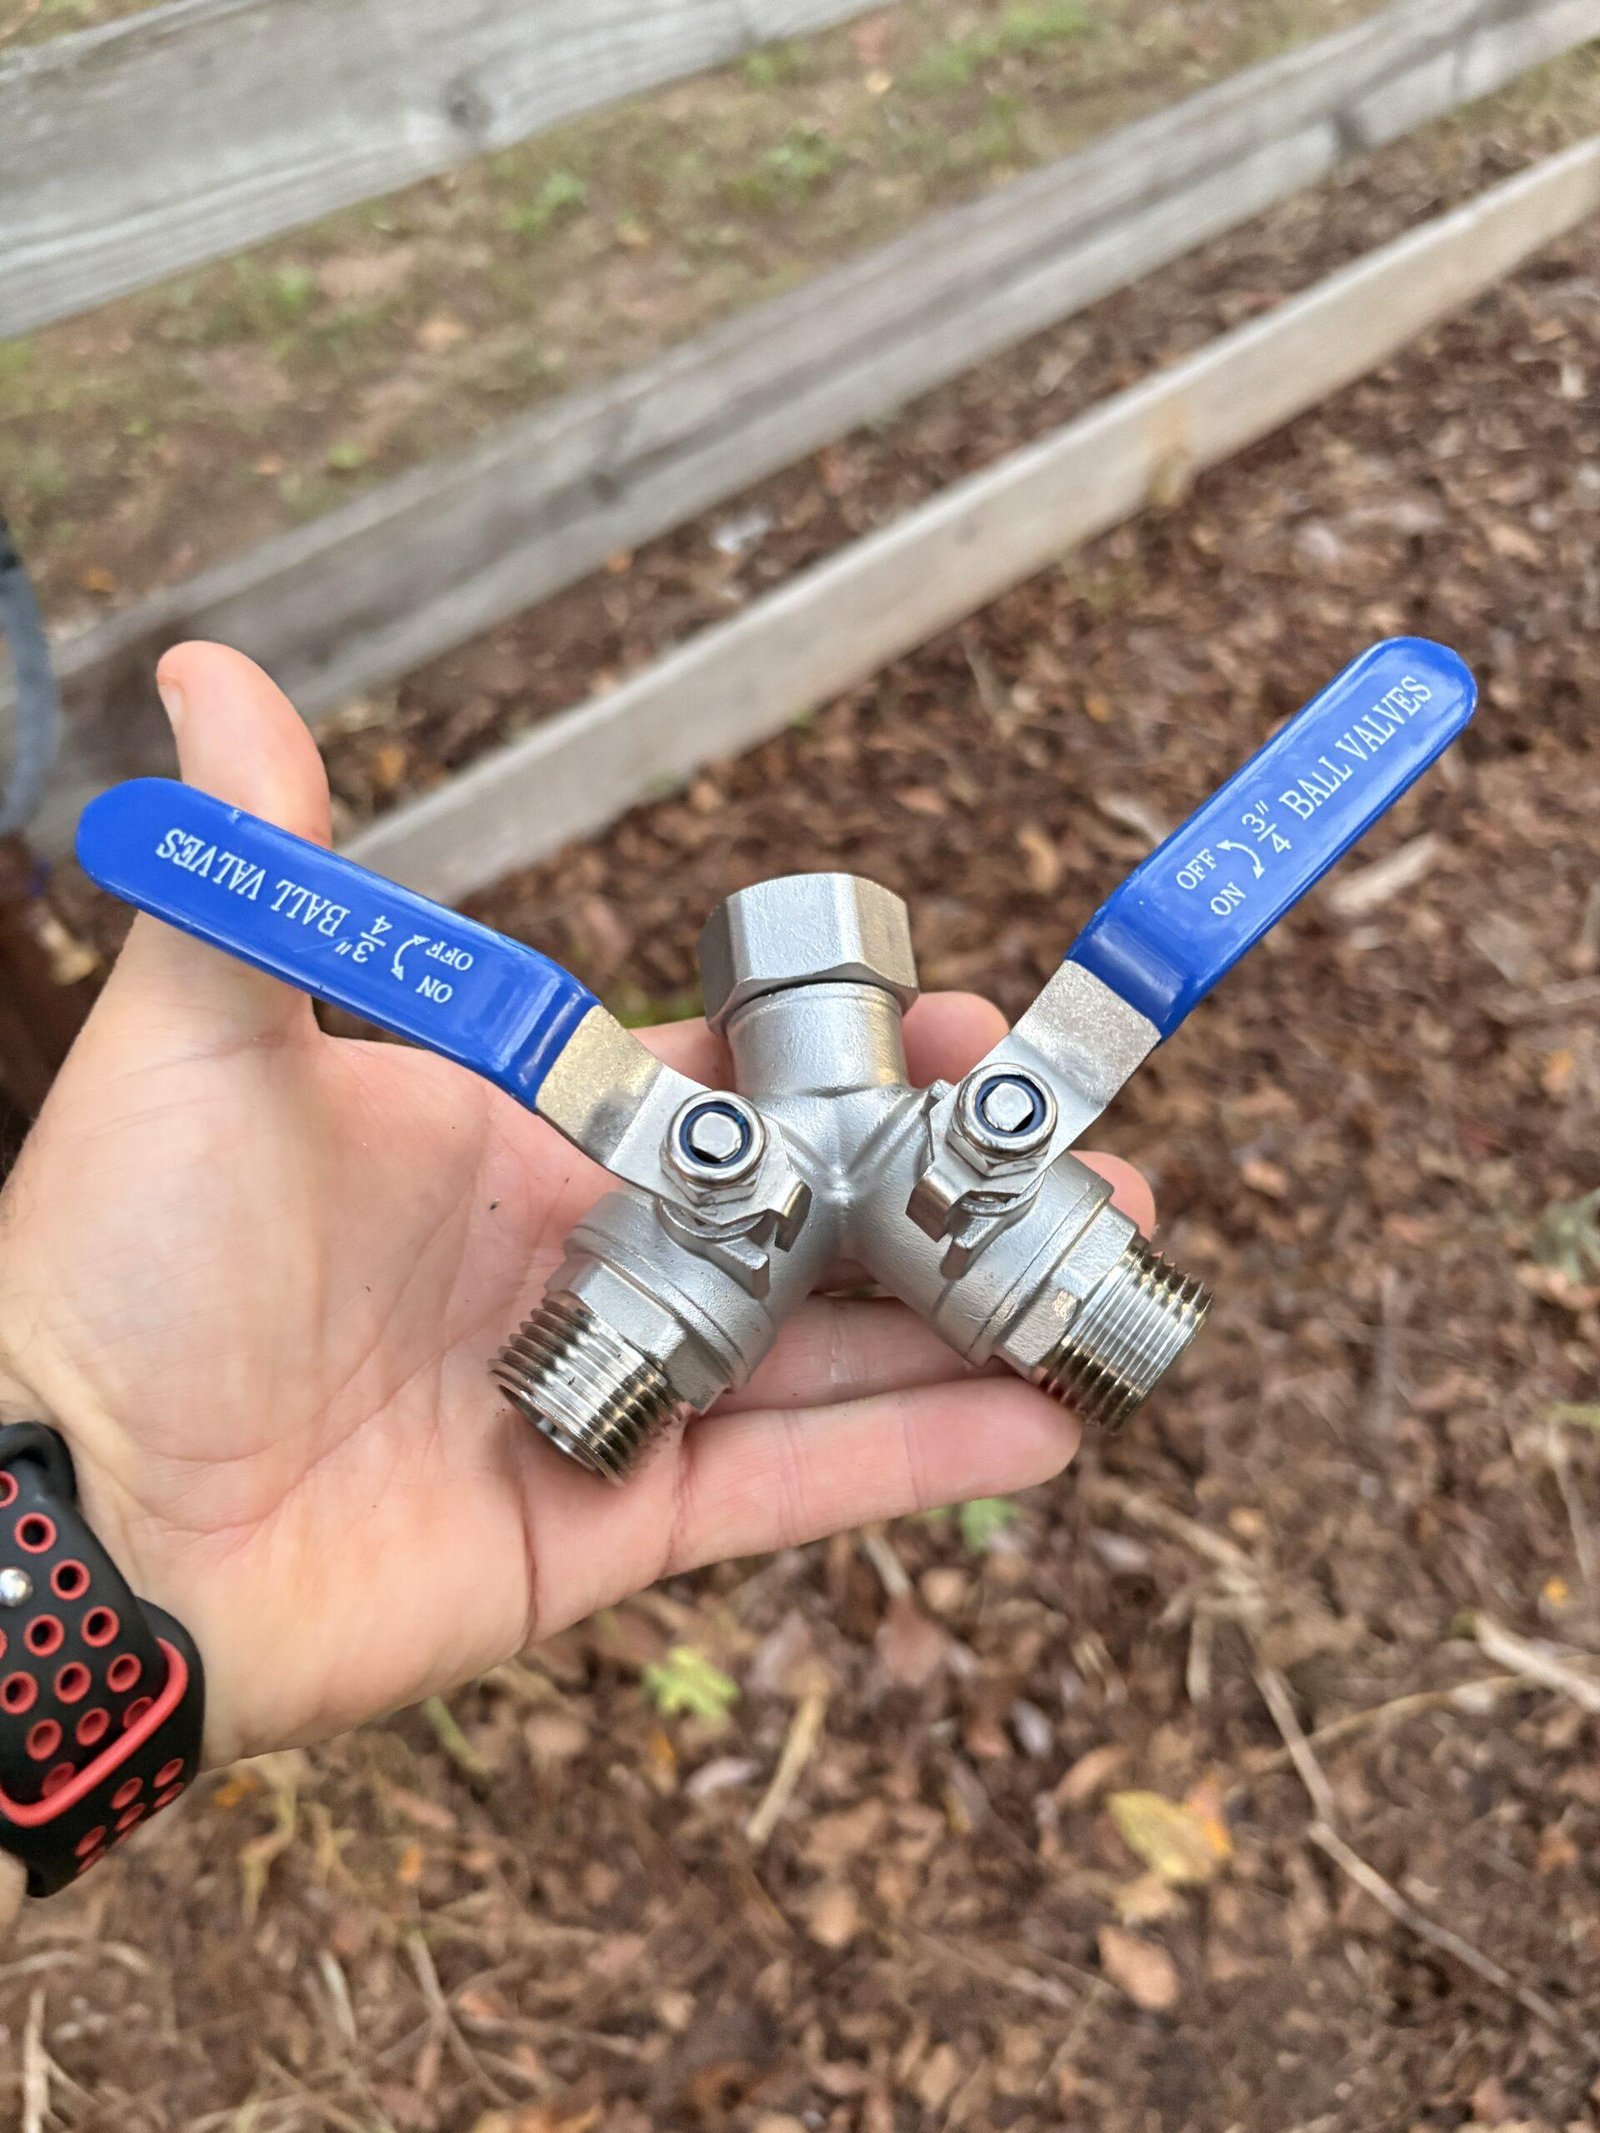
I also added a hose splitter at the spigot.
I like this setup because the drip irrigation system can stay connected while the other side of the splitter is still available for a regular garden hose.
Without the splitter, you may find yourself disconnecting the irrigation system every time you need the hose. No thank you.
Water Timer
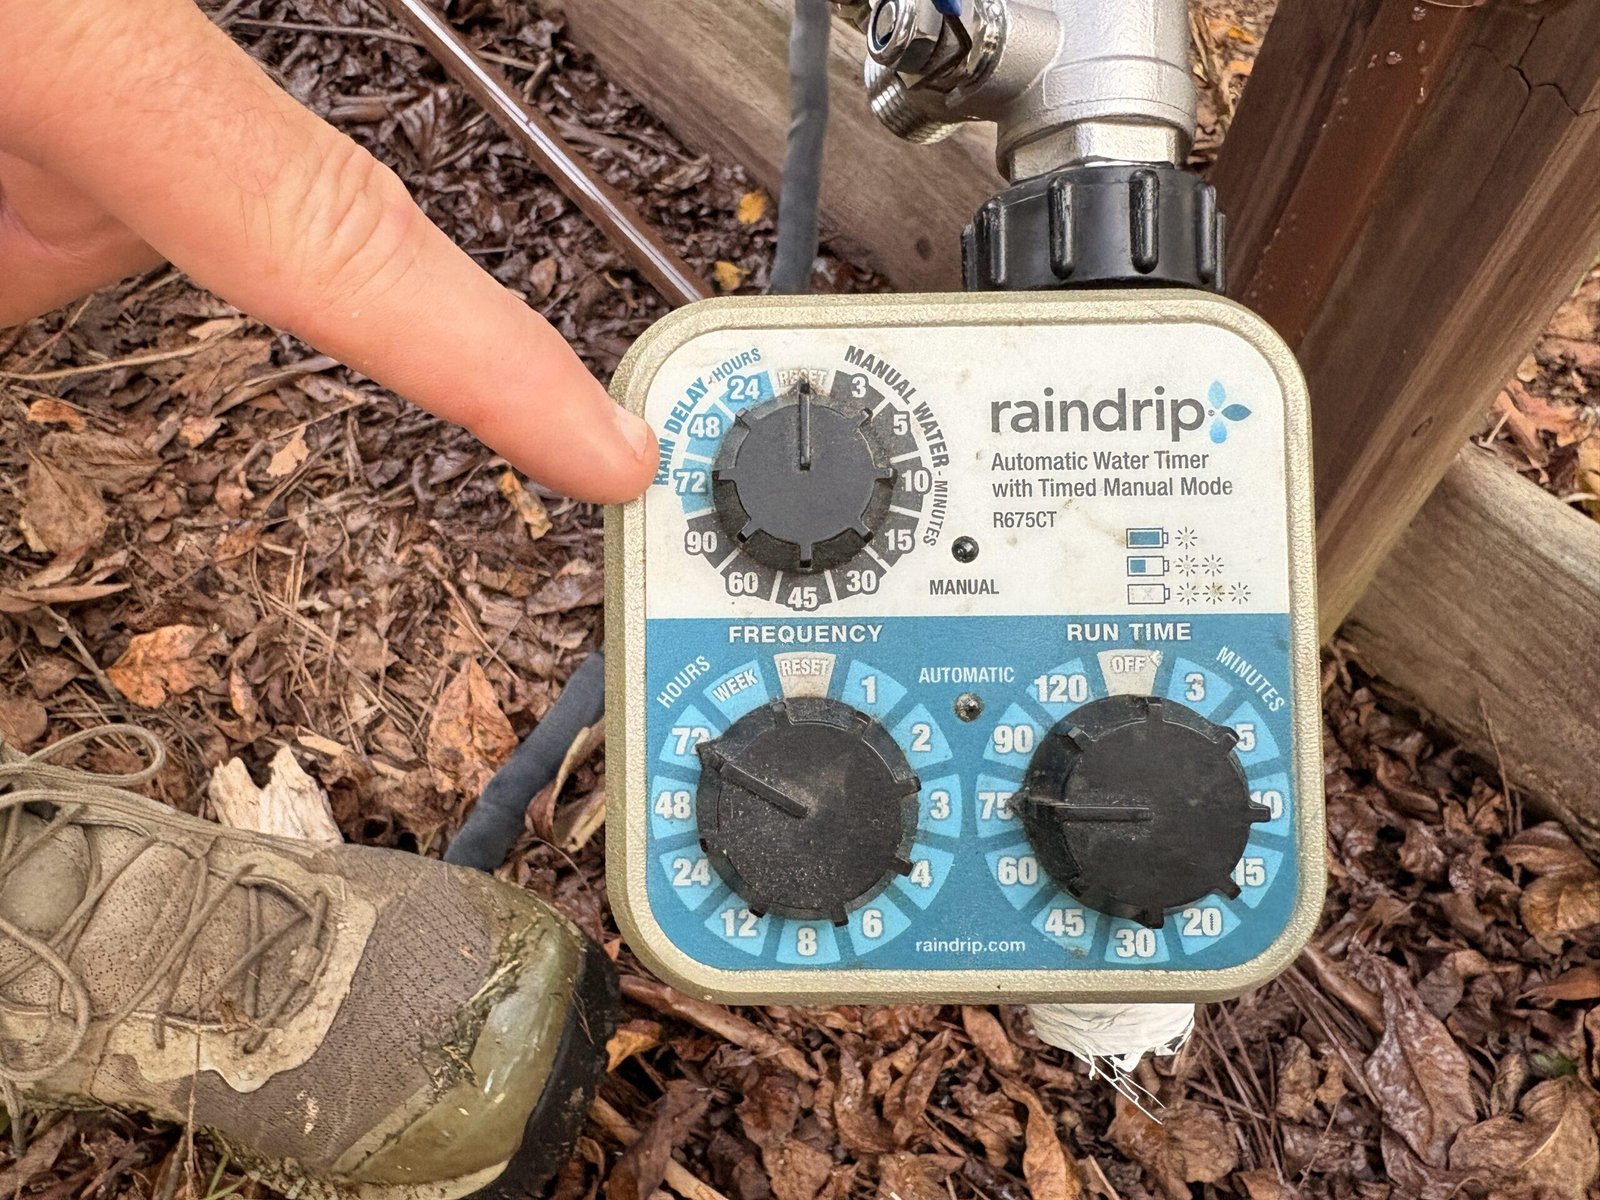
We used the Raindrip R675CT 3-Dial Water Timer with Rain Delay.
The timer lets the drip irrigation system run automatically instead of depending on us to remember to turn the water on and off every time.
It also has a rain delay, which is handy when Mother Nature decides to handle the watering for you.
A timer is convenient, but don’t let the timer make all your decisions. Rainfall, temperature, soil, shade, and the age of the plant can all change how often a hydrangea needs water.
Our Growing Hydrangeas in Georgia guide explains why we prefer checking the soil instead of blindly following the same watering schedule all season.
The Tubing We Used
We used two kinds of 1/2-inch tubing in this setup.
1/2-Inch Water Supply Tubing
The 1/2-inch drip irrigation water supply tubing carries water through the system.
Think of this as the main road.
We could run the supply tubing where we needed it and then use fittings and emitters to get the water where we wanted it.
Rain Bird Tubing with Built-In Emitters
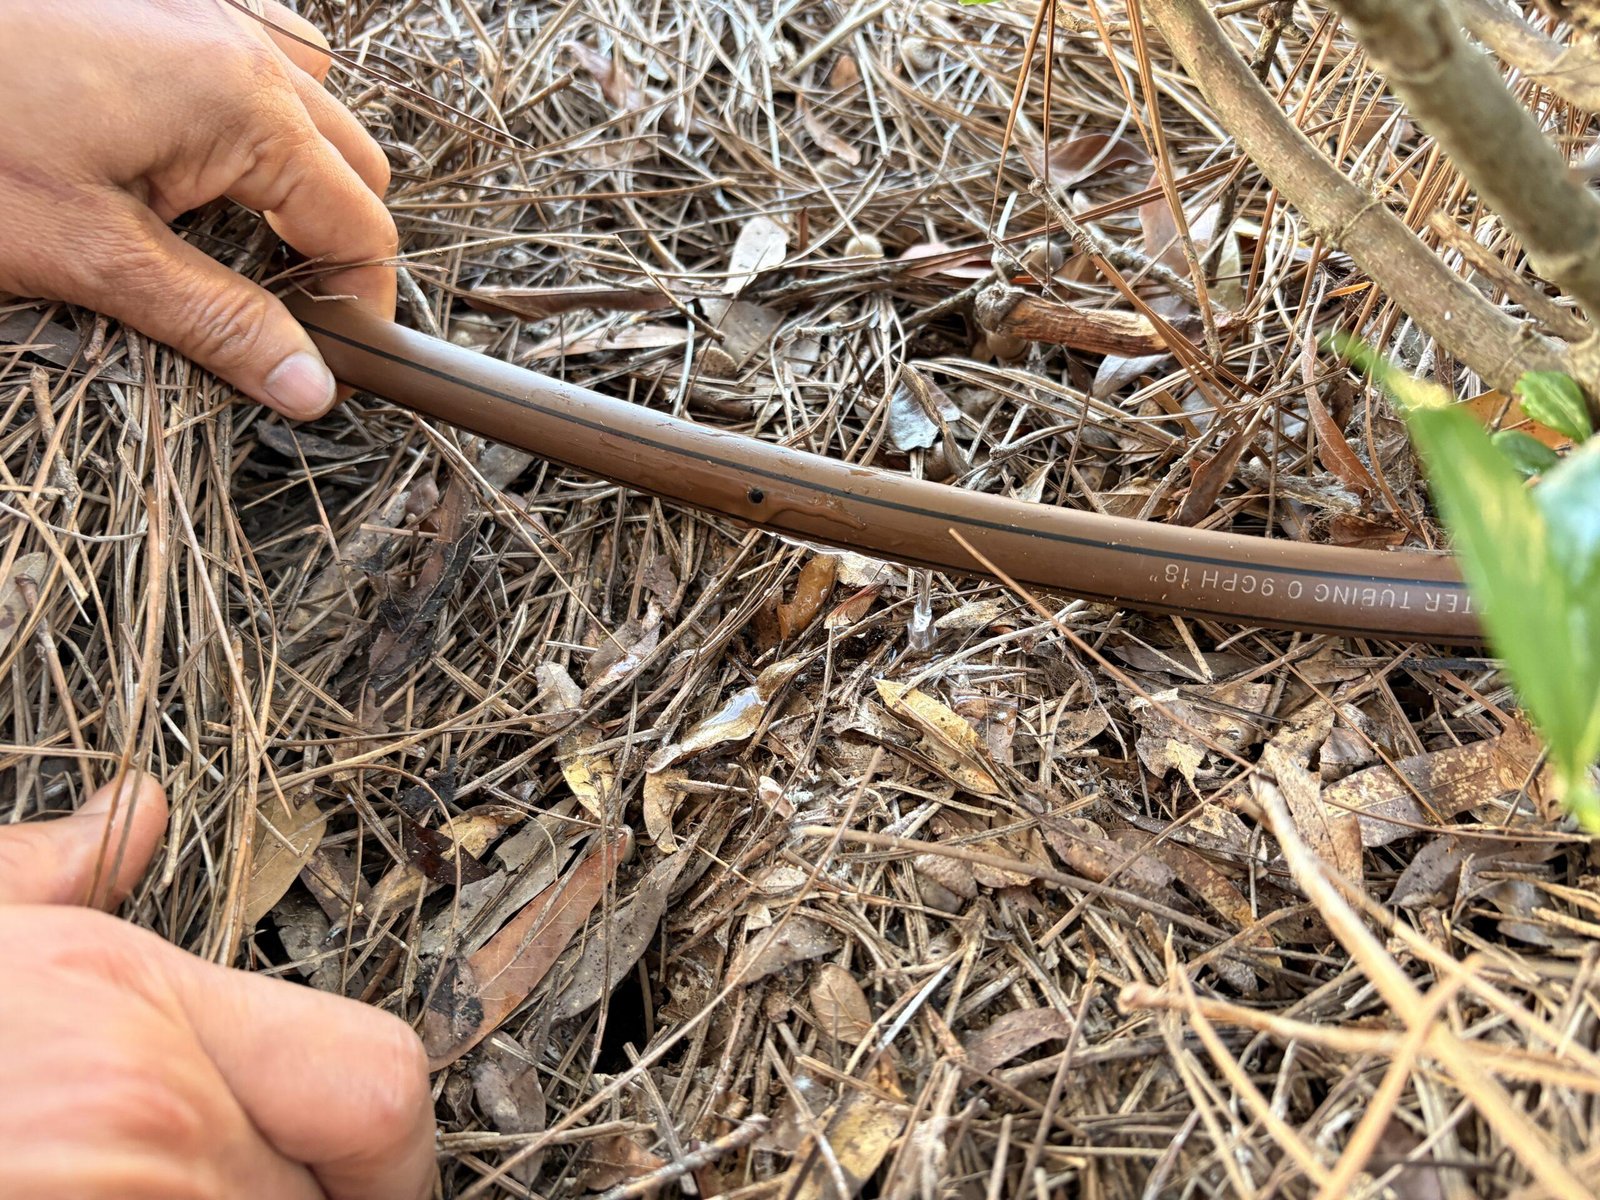
We also used Rain Bird SSF70-50S 1/2-inch Drip Emitter Tubing.
This tubing already has emitters installed every 18 inches.
Lynn helped lay this tubing out through the planting area before we secured everything in place.
Having the emitters already spaced along the tubing makes this type especially handy when you’re watering a row of plants rather than trying to install an individual emitter at every single spot.
How We Installed Drip Irrigation for Hydrangeas
Once we had the system planned and all the pieces in front of us, we started putting everything together.
Connect the Splitter and Timer
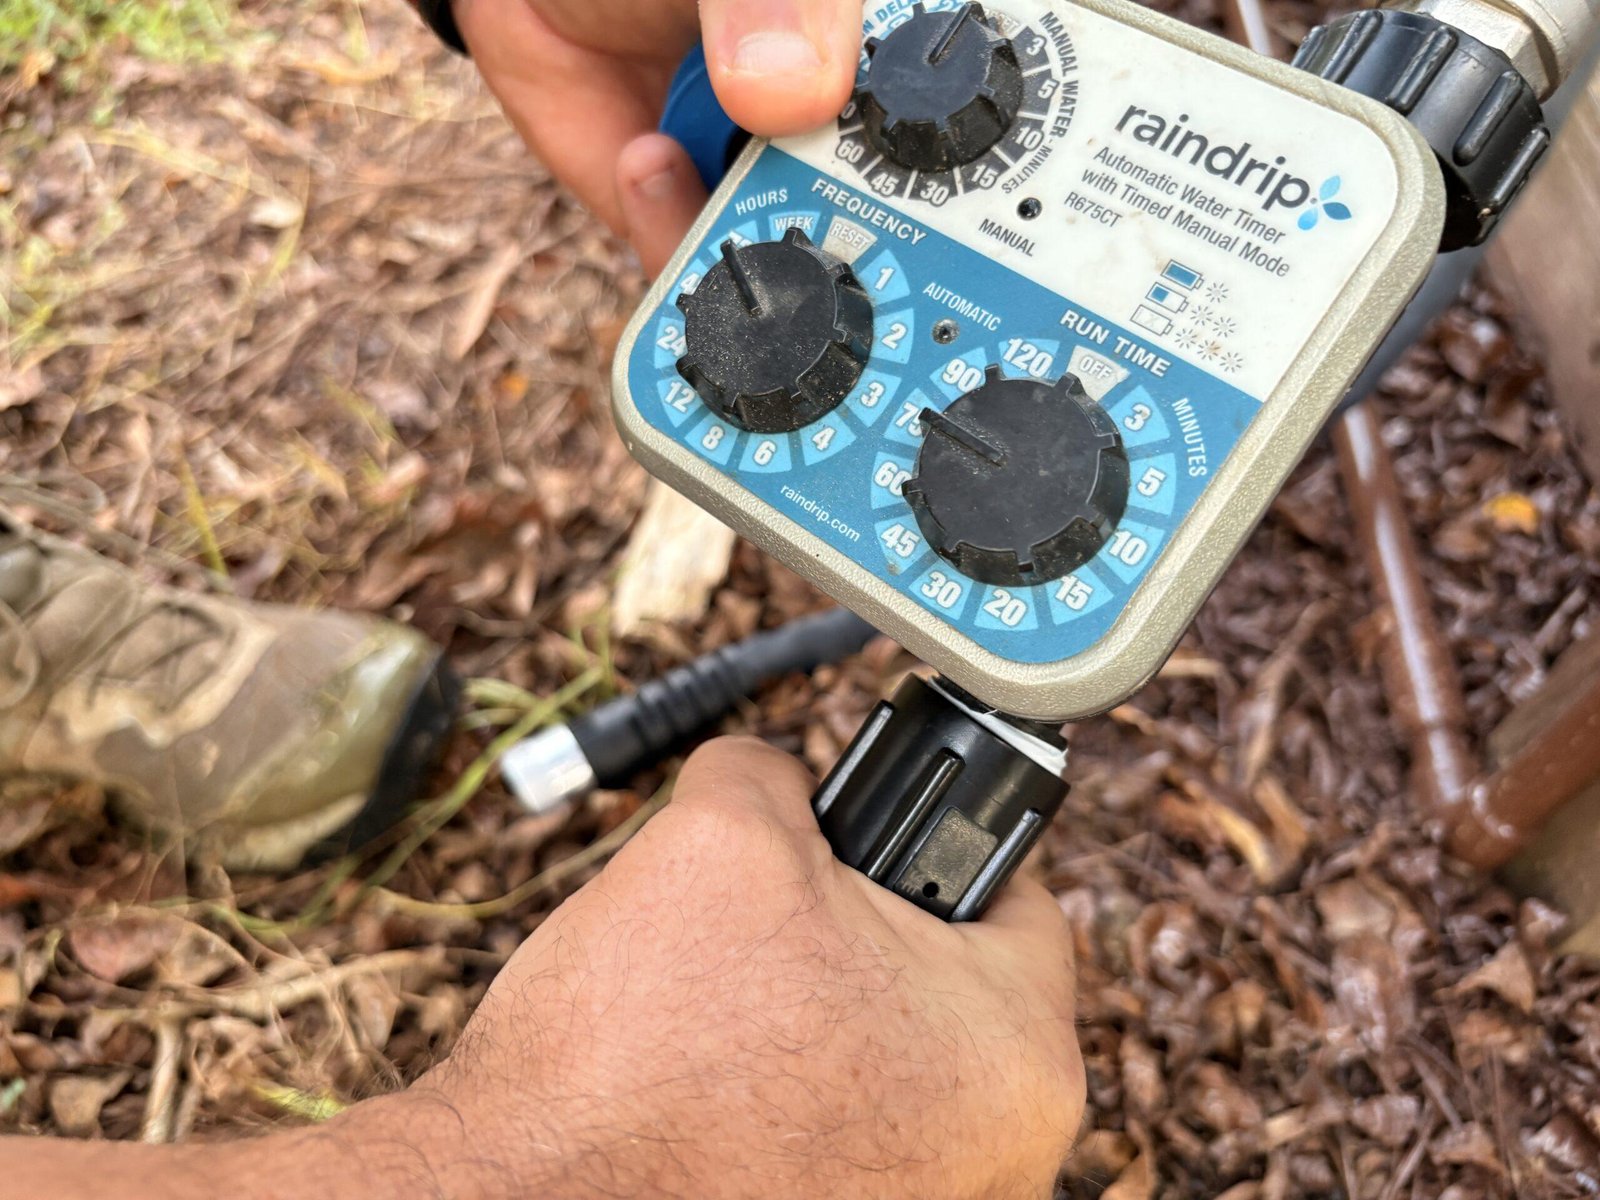
We started at the water source.
The hose splitter lets us dedicate one outlet to the irrigation system while leaving the other available for our regular garden hose.
The timer connects into that setup so the watering schedule can be controlled automatically.
We took a close-up photo while connecting the hose to the timer because this is one of those steps that’s much easier to understand when you can actually see the pieces going together.
Use Teflon Tape on Threaded Connections
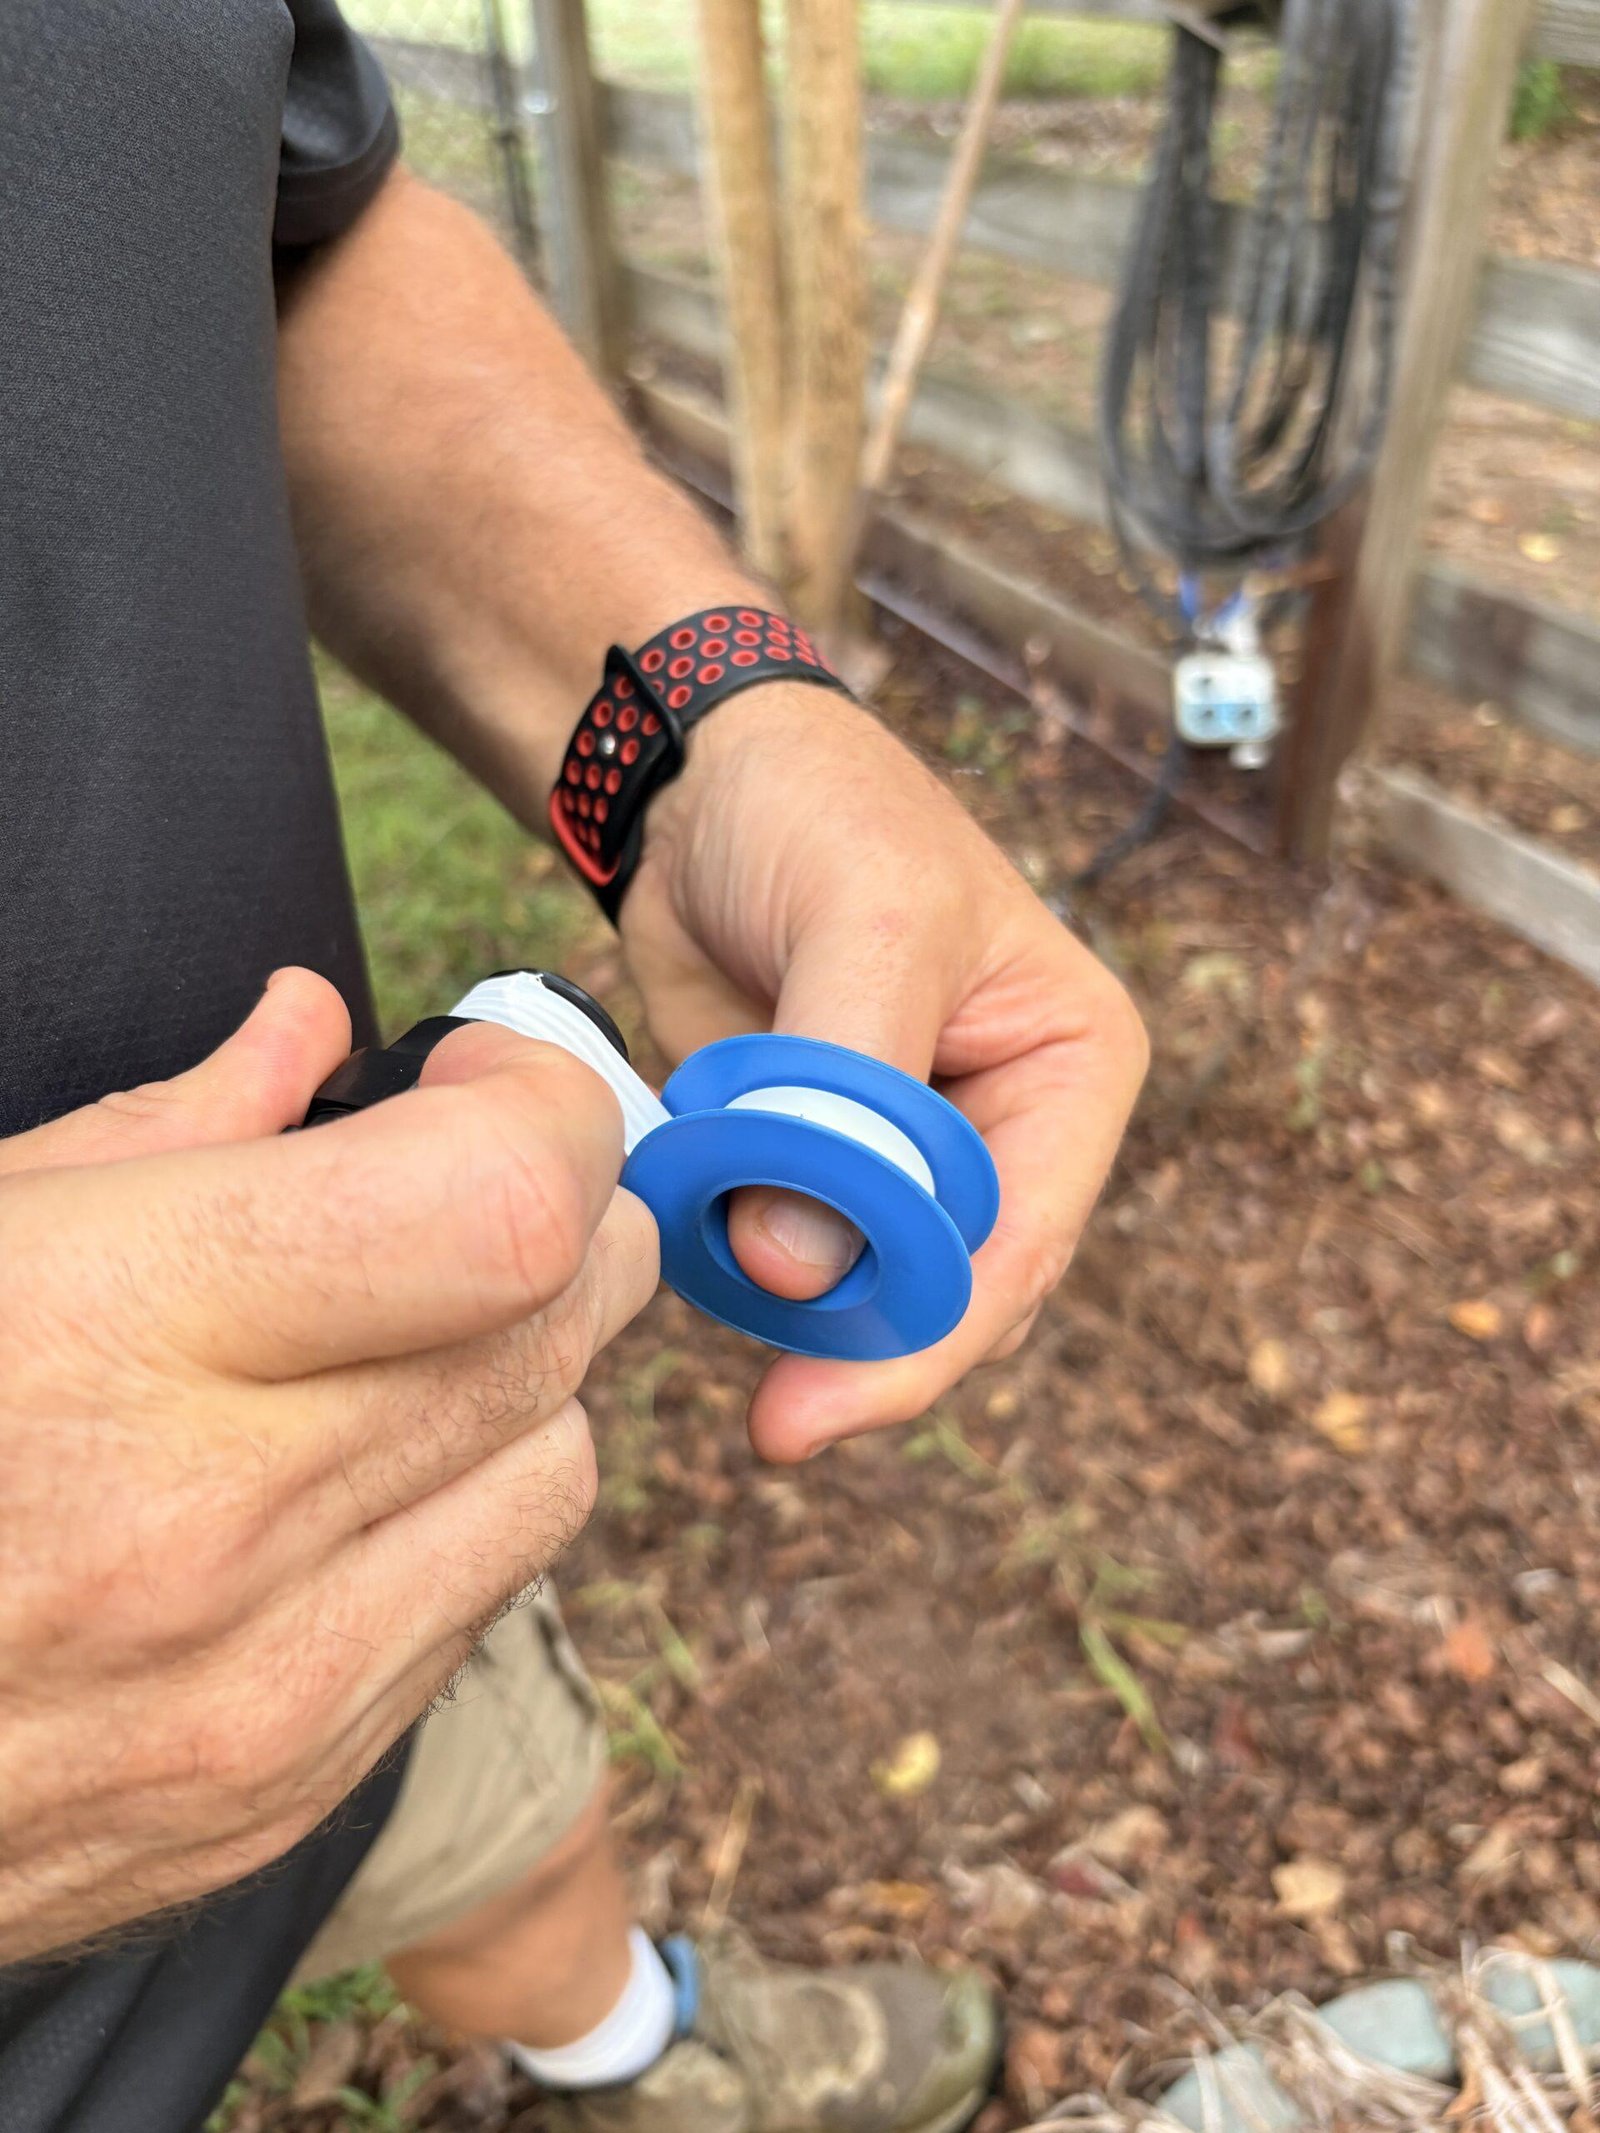
We use Teflon tape on all threaded connections in our drip irrigation setup.
Wrap the tape around the threads before putting the connection together.
It’s a small step, but it’s worth doing because it helps create a snug connection and can help prevent those aggravating little leaks that show up once you turn the water on.
We photographed this step too because it’s easy to skip when you’re excited to get everything hooked up.
Connect the Main Tubing
Next, we connected the 1/2-inch tubing to the hose connection.
Make sure the tubing is seated securely before moving on.
Don’t rush through the connections. Once the system is fully assembled, it’s a lot easier to fix something now than after you’ve pinned 50 feet of tubing to the ground.
Lay the Tubing Out Before Securing It for Drip Irrigation for Hydrangeas
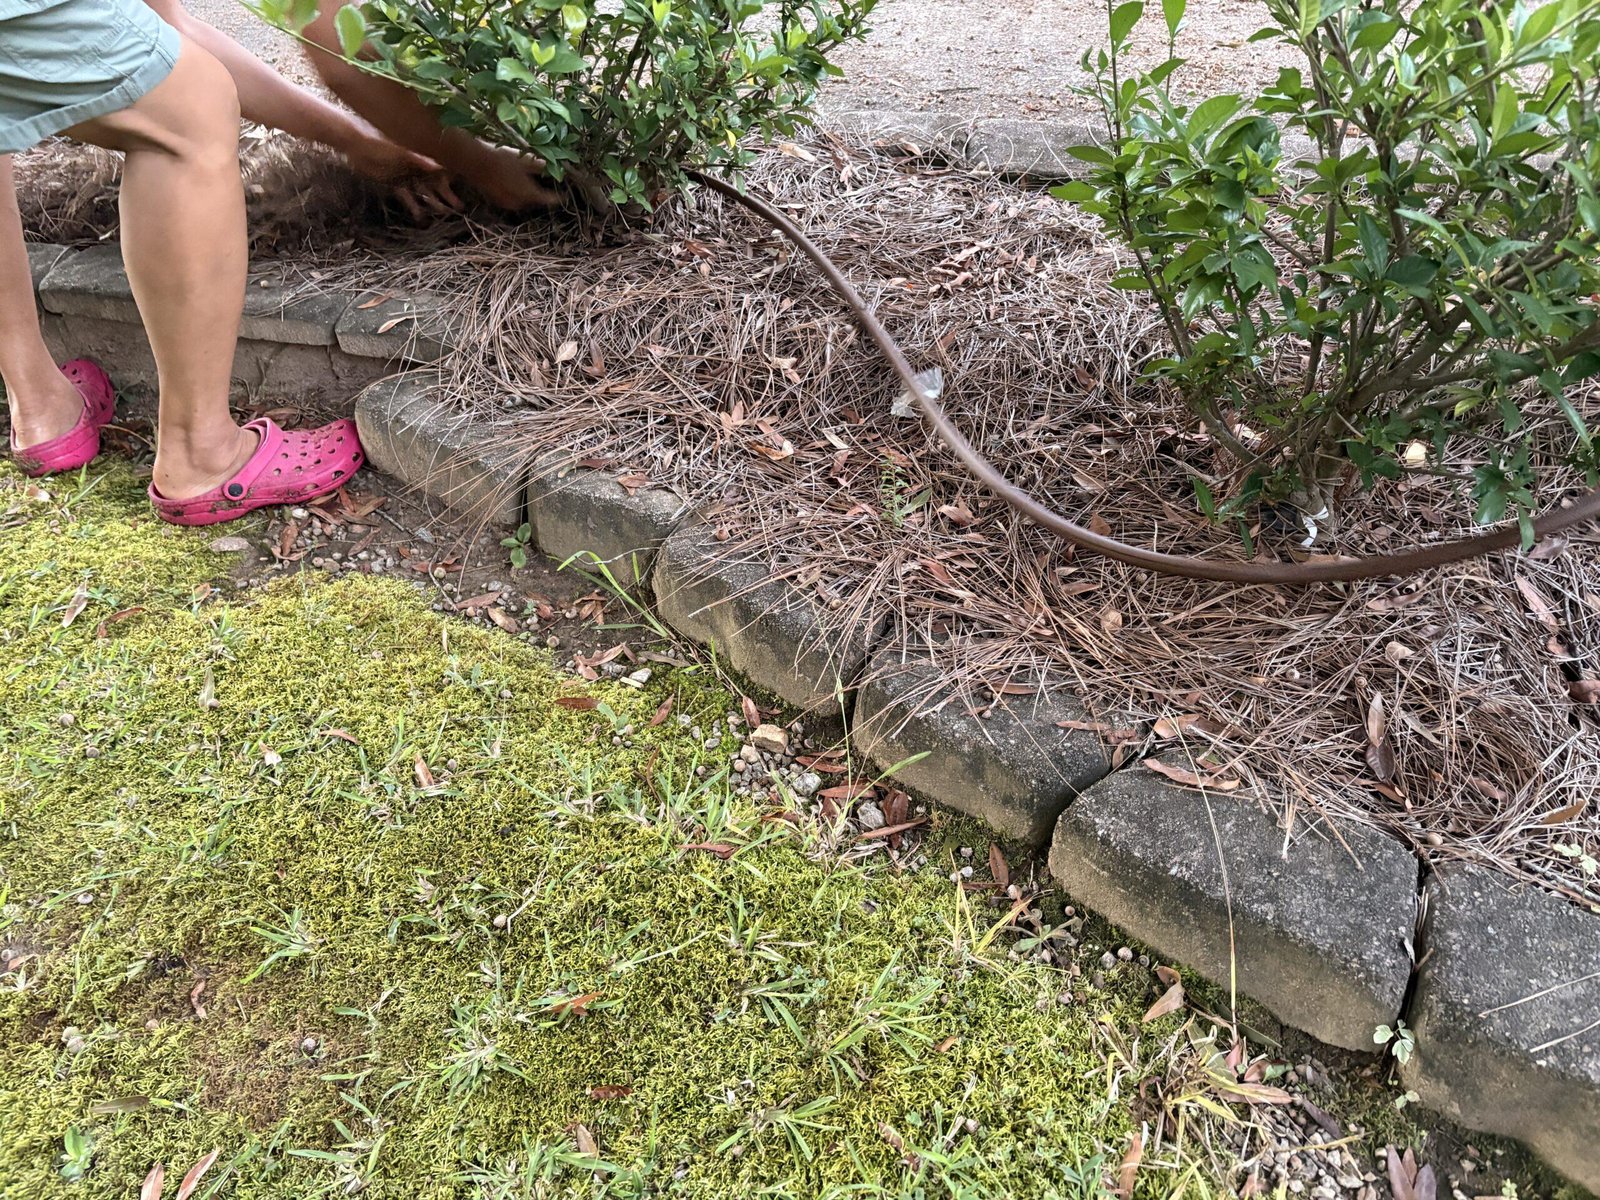
We laid the tubing out through the hydrangea area before fastening it down.
This gives you a chance to step back and see whether the route makes sense.
Lynn laid out our Rain Bird emitter tubing while we checked the placement around the plants.
This is another reason I like drawing the system first. You already have a pretty good idea where everything should go before the tubing ever hits the ground.
Still, don’t be afraid to adjust it once you’re standing in the bed. Paper is flat. Gardens have roots, shrubs, rocks, curves, and all sorts of other surprises.
Make Your Turns
Drip tubing doesn’t always need to travel in a straight line.
For our 90-degree turns, I used the Orbit 67490 1/2-inch Drip-Lock Elbows.
I tried Rain Bird parts for most of this project, but I personally liked the Orbit elbows better.
That’s why you’ll see a mix of brands in our setup.
I don’t believe every part of a garden project has to have the same logo printed on it. I use what works best for us.
Branch the Line Where Needed
When a line needs to split and travel in two directions, a tee makes that possible.
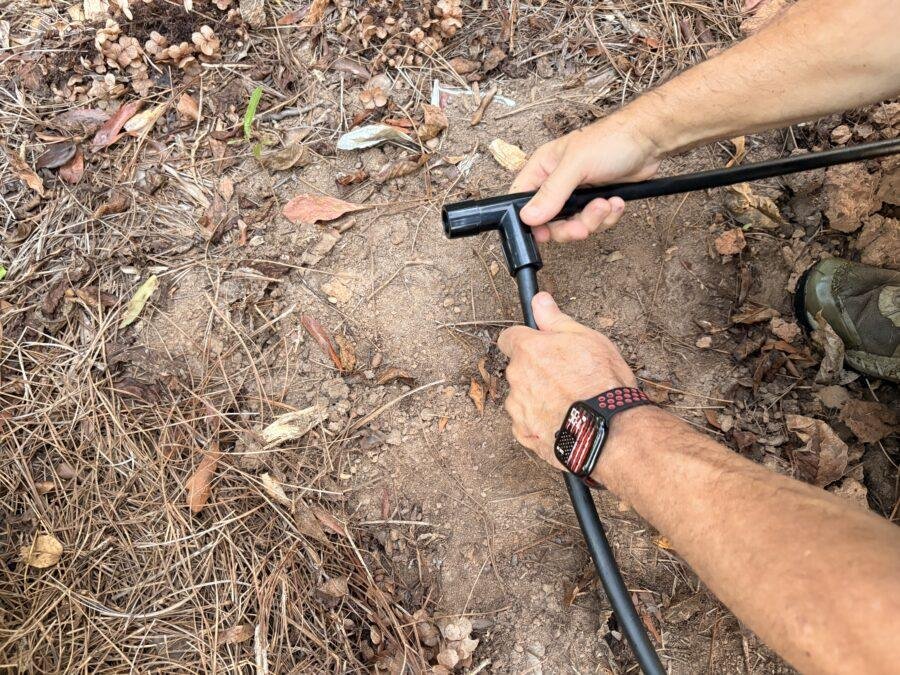
We used the Rain Bird Easy Fit Universal Tee for 1/2-inch tubing.
Again, this is where your paper sketch helps.
Knowing where your branches need to be before cutting tubing makes the whole job much easier.
Join Sections of Tubing
We used a Rain Bird Easy Fit Coupling when two sections of dripline needed to be connected.
Couplings can also come in handy later if you ever have to repair a section or extend the system.
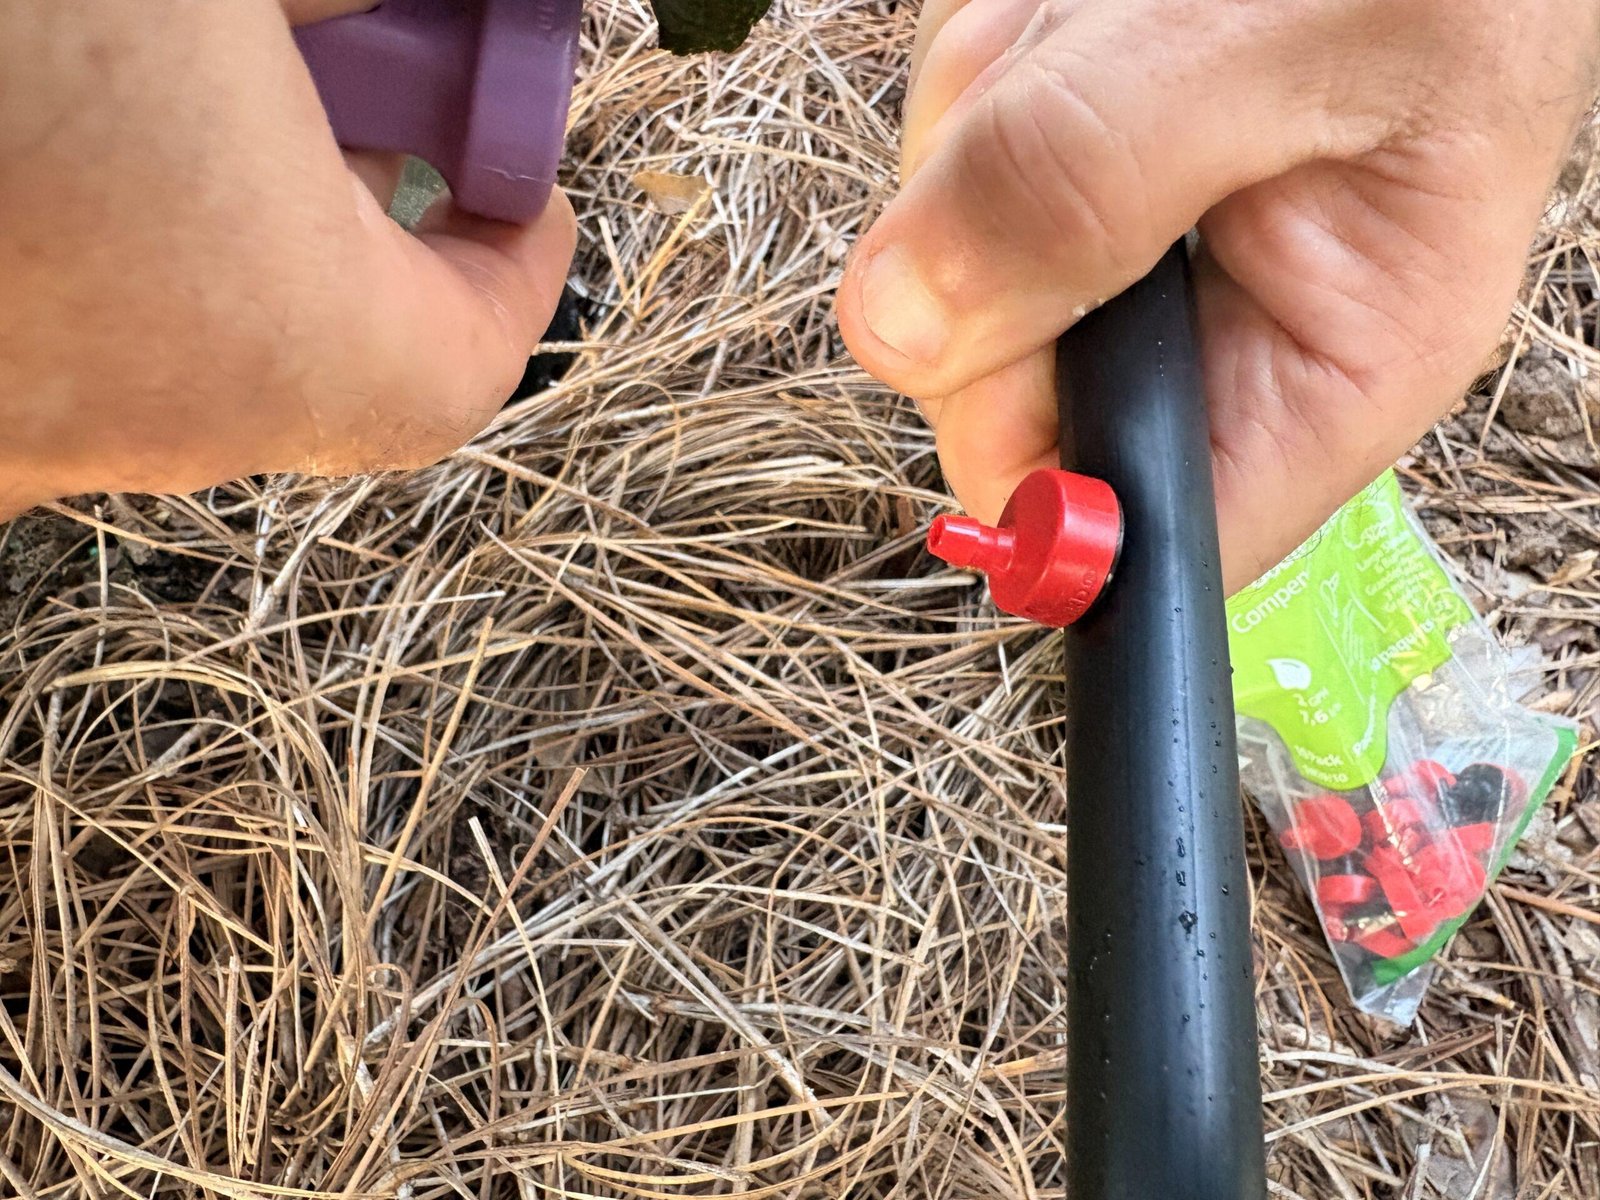
Add Individual 2 GPH Emitters
In places where we wanted an individual emitter, we used Rain Bird 2 GPH Drippers.
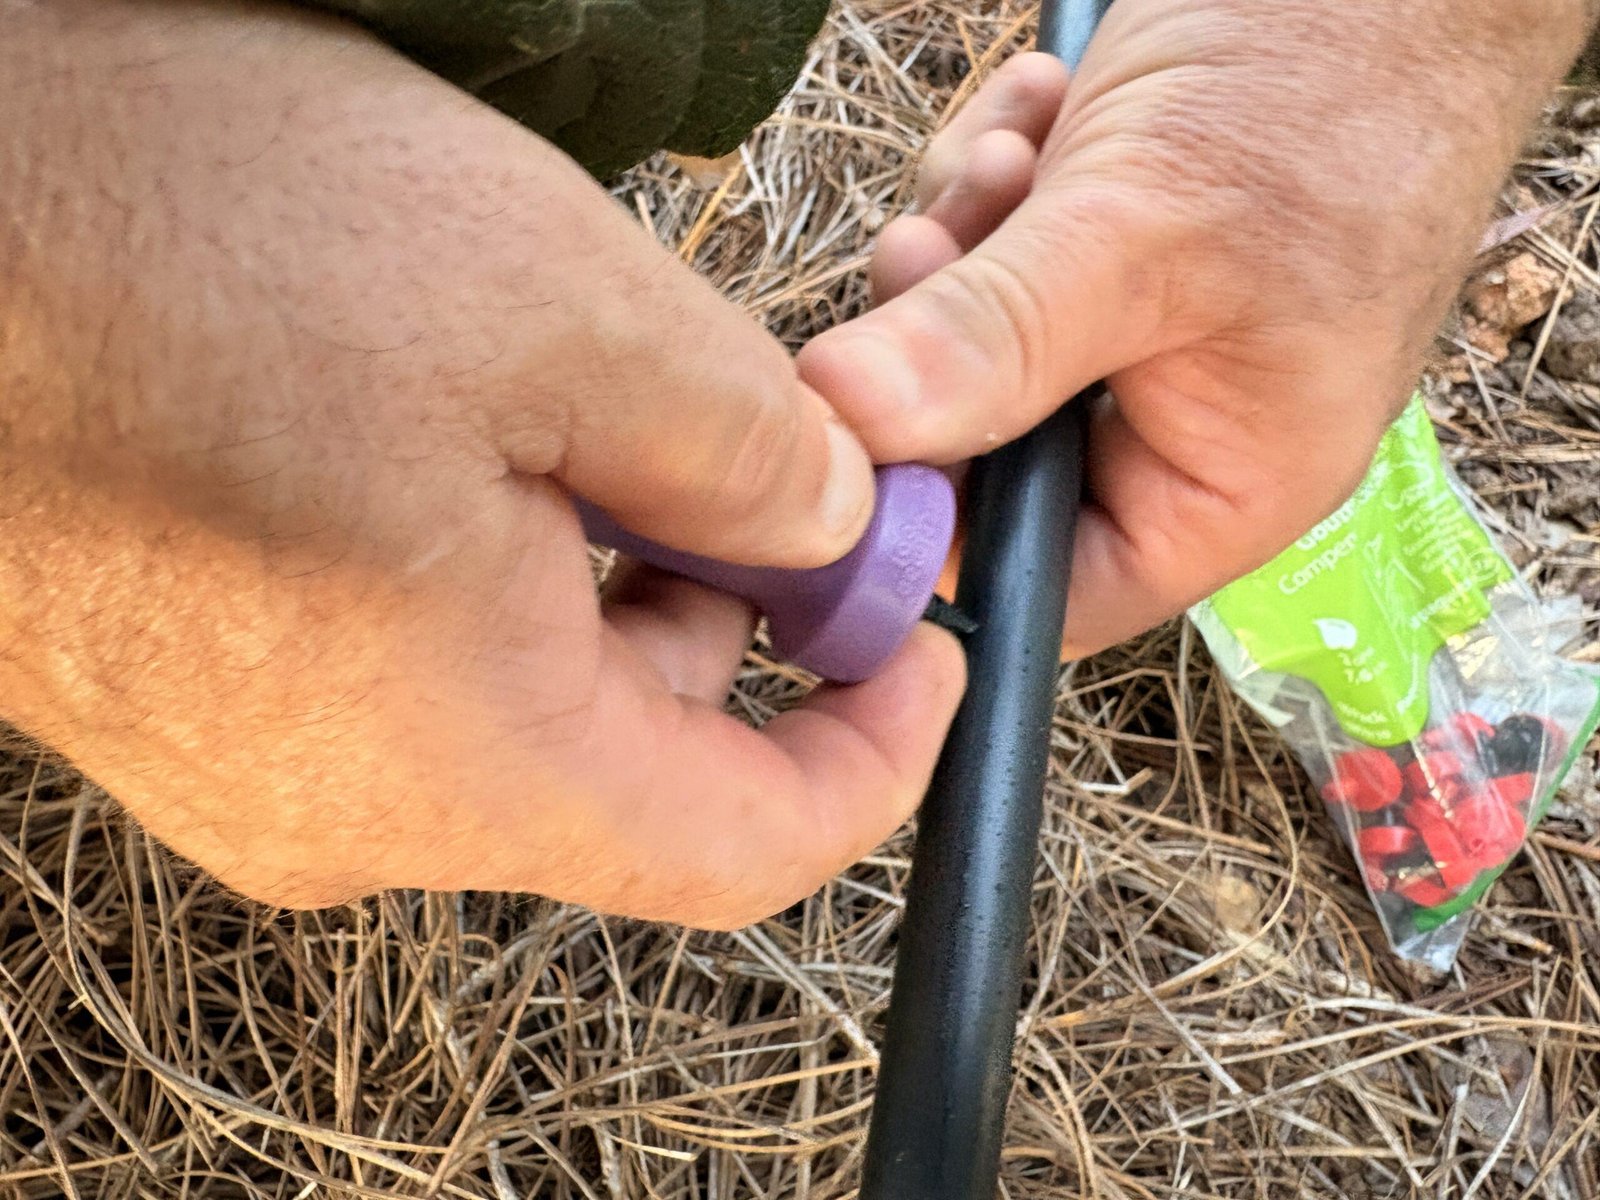
The 2 GPH means the emitter is rated to deliver about two gallons of water per hour under its designed operating conditions.
We used the Rain Bird Drip Emitter Tool to install the emitters into the tubing.
We photographed this part up close, including the emitter being installed into the tubing.
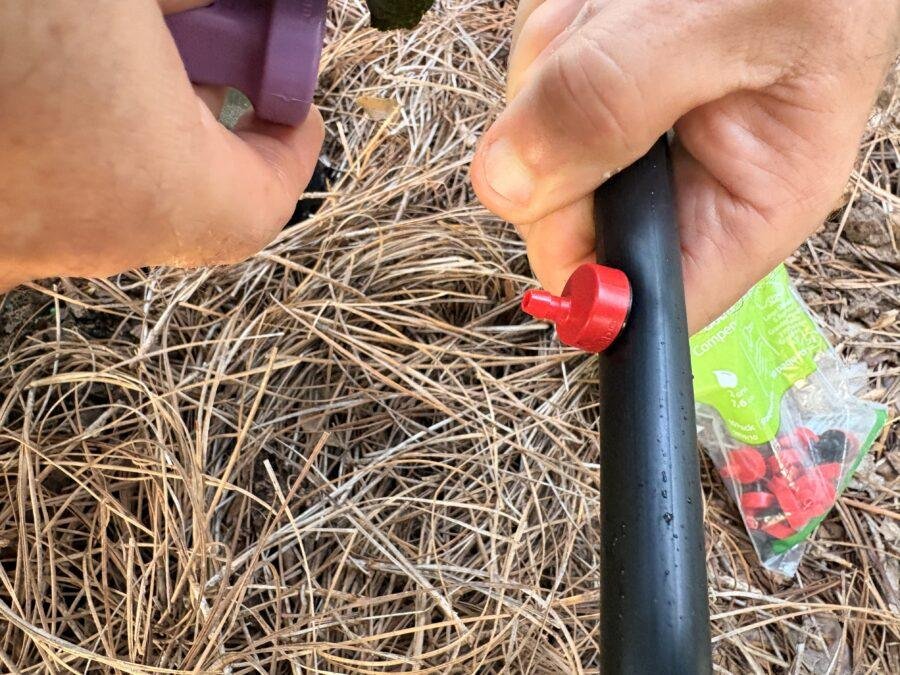
It’s a simple little tool, but it makes installing the emitters much easier than trying to improvise with something that wasn’t made for the job.
Where Should the Emitters Go Around a Hydrangea?
Try to water the root area rather than putting every drop right against the main stems.
For a young hydrangea, the root system is still fairly concentrated around the original root ball.
As the plant grows, the active root area spreads outward.
That means an irrigation system shouldn’t necessarily stay exactly the same forever.
Check it occasionally.
As your hydrangeas get larger, you may need to move emitters, add another emitter, or change the tubing arrangement so you’re still watering the useful root area.
That’s another advantage of building the system from individual components. You can change it as your garden changes.
Close the Ends of the Tubing
Every open run needs to be closed.
We used 1/2-inch drip tubing end closures at the ends of our lines.
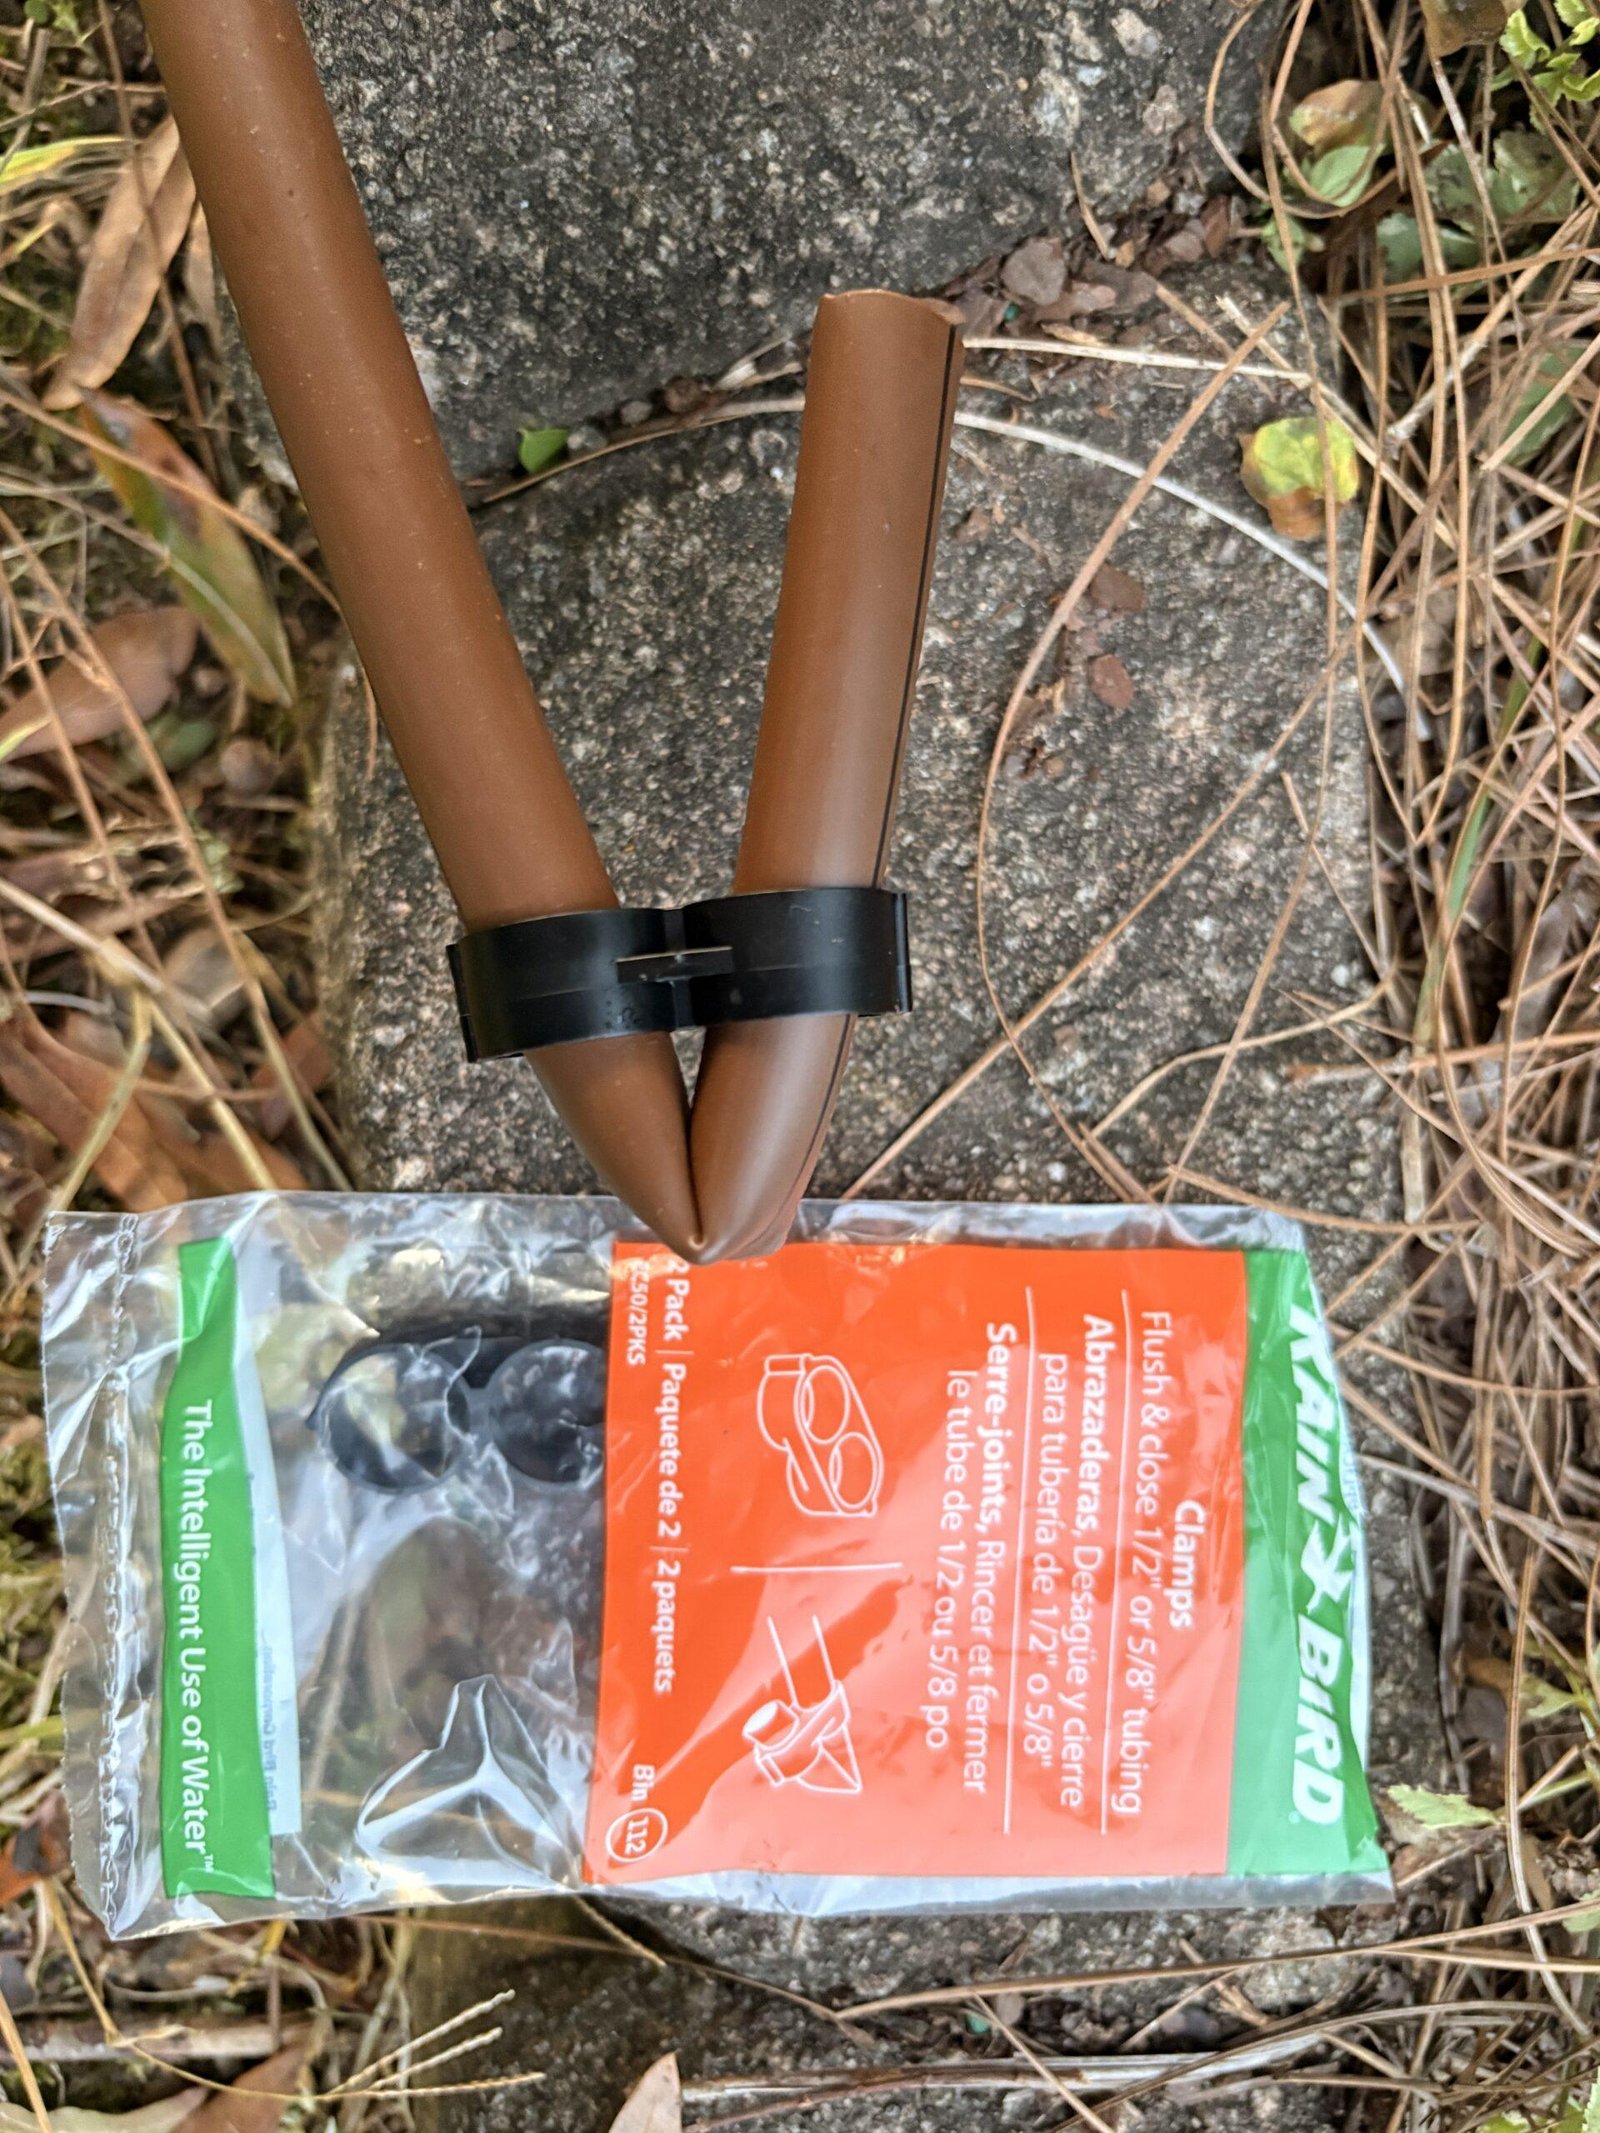
We also photographed the packaged end caps so readers can see what these little fittings look like before they’re installed.
They’re not exactly the glamorous part of drip irrigation, but leave one off and you’ll figure out pretty quickly why you need it.
Secure the Drip Tubing
Once we were happy with the layout, we used 12-inch galvanized landscape staples to hold the tubing in place.
I prefer getting everything positioned correctly before driving the staples into the ground.
That way you’re not pulling staples back out every five minutes because you changed your mind about where the tubing should run.
The staples help keep the tubing from moving around as you work in the bed, add mulch, or walk nearby.
Test the Drip Irrigation System Before You Finish
Don’t cover everything up and call it finished before you test it.
Turn the water on.
Then walk the entire system.
Look at every connection.
Check your tees, elbows, couplings, timer connections, end caps, and emitters.
Watch for leaks.
Make sure water is actually coming from the emitters.
This is also a good time to make sure the water is reaching the areas around your hydrangeas where you intended it to go.
Finding a problem while everything is still exposed is much easier than finding it after you’ve finished the bed.
How Long Should Drip Irrigation Run for Hydrangeas?
There isn’t one run time that’s right for every hydrangea.
That’s important.
Heavy clay soil behaves differently from sandy soil. A newly planted hydrangea has different needs from one that’s been growing in the ground for five years. A plant getting morning sun and afternoon shade may dry out more slowly than one growing in considerably more sun.
Even two hydrangeas in the same yard can behave differently.
Instead of choosing a watering time once and never changing it, use the system to deliver water slowly and then check the soil.
You want moisture reaching into the root zone, not just wetting the top half inch of soil.
UGA Extension also notes that irrigation needs vary with the plant, soil, existing soil moisture, and season.
During our Georgia summers, we pay much closer attention during long stretches of heat and little rain.
When cooler weather arrives or regular rain returns, the system doesn’t need to run like it did during a hot, dry spell.
Drip Irrigation Doesn’t Mean You Can Stop Checking Your Plants
Automatic watering is convenient.
It isn’t magic.
An emitter can clog.
A connection can leak.
An animal can disturb tubing.
A timer setting can get changed.
You can also get several inches of rain and suddenly not need irrigation at all.
Walk your garden.
Feel the soil.
Look at your hydrangeas.
The whole point of installing drip irrigation for hydrangeas is to make watering easier and more consistent, not to stop paying attention to the plants.
What We Would Do Again
After putting our system together, I’d absolutely sketch the layout first again.
I’d also buy the individual parts again instead of automatically reaching for a complete kit.
A kit isn’t necessarily a bad purchase. If you’re building a small, simple system and the kit contains what you need, it may be perfect.
For our setup, though, planning first and buying the individual pieces made more sense.
We got the amount of tubing we needed.
We bought the right number of fittings.
We chose the emitters we wanted.
And when I found that I preferred the Orbit elbows, I could simply use those instead of feeling locked into one brand.
That’s the beauty of building your own setup.
It fits your garden instead of making your garden fit what’s inside a box.
A Few Things We’d Recommend Before You Start
Before buying anything, walk the area with a piece of paper and sketch where the water needs to go.
Mark the spigot.
Mark each hydrangea.
Draw your main tubing route.
Mark every turn.
Mark every place the line needs to split.
Decide whether you want individual emitters, tubing with built-in emitters, or a combination of both.
Then count everything.
Buy a few extra small fittings if you want a little insurance, but there’s no need to buy a giant assortment of parts just because they come together in a kit.
Most importantly, build the system around your plants and your yard.
Is Drip Irrigation Worth It for Hydrangeas?
For us, yes.
It takes some planning and a little work on the front end, but once the system is installed, watering becomes much easier.
Instead of dragging hoses around the garden, we can deliver water slowly where it’s needed.
That’s especially helpful during those hot Georgia stretches when hydrangeas can go from looking happy to looking like they’ve given up on life by lunchtime.
Just remember that drip irrigation is a tool.
The plants still tell you what they need.
Check the soil, watch the weather, adjust the timer when conditions change, and keep an eye on the system.
Do that, and drip irrigation for hydrangeas can take one of the biggest chores out of keeping these thirsty shrubs looking their best.
For more firsthand hydrangea tips from our garden and plant farm, follow Bobby & Lynn’s Plant Farm on Facebook.
Discover more from Bobby and Lynn’s Plant Farm
Subscribe to get the latest posts sent to your email.