Sometimes a hydrangea ends up in the wrong spot. Maybe it’s getting too much afternoon sun. Maybe it has outgrown the space. Maybe you planted it where it looked good at first, but now it’s blocking a walkway, crowding another shrub, or leaning halfway across the yard trying to find better light.
Quick Answer
The best time to transplant hydrangeas is in late fall, late winter, or very early spring while the plant is dormant or nearly dormant. Prepare the new hole first, water the hydrangea before digging, preserve as much of the root ball as possible, and replant it at the same depth. Water deeply afterward and avoid fertilizing until the plant has begun to establish.
Moving a Hydrangea Can Be Stressful
Is Your Hydrangea Struggling After Transplanting?
Wilting, drooping leaves, slow growth, and temporary leaf damage can happen after a hydrangea is moved. Some transplant stress is normal, but planting depth, root damage, heat, sunlight, and watering can make it worse. If your plant is not recovering the way you expected, our Hydrangea Help Center can help you work through the symptoms.

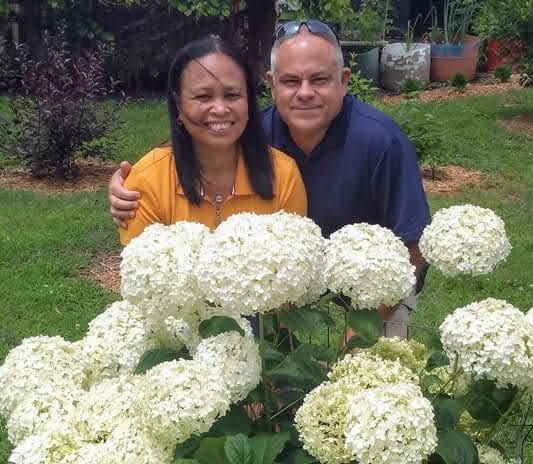
About Bobby & Lynn

When Is the Best Time to Transplant Hydrangeas?
The best time to transplant a hydrangea is while the plant is dormant or entering dormancy.
For most gardeners, that means:
- Late fall after the leaves have dropped
- Late winter
- Very early spring before new growth begins
Moving a hydrangea during dormancy gives the roots time to settle in before the plant has to support leaves and flowers.
Here in the South, late fall is often an excellent time because the soil is still warm enough for root growth, but the weather is cooler and less stressful on the plant.
Try to avoid transplanting during the heat of summer. A hydrangea already loses quite a bit of moisture through its leaves, and digging it up during hot weather can cause serious wilting and transplant shock.
Sometimes you don’t have a choice, though. If a hydrangea must be moved during the growing season, choose a cloudy day, work early in the morning, and be prepared to give it extra water and attention.
UGA Extension’s hydrangea planting and care guidance also recommends planting hydrangeas at the proper depth and waiting until the plant is established before fertilizing.
Choose the New Location Before You Start Digging
Don’t dig up the hydrangea and then walk around the yard trying to decide where it should go.
Pick the new location first and have the planting hole ready.
Most hydrangeas prefer morning sun with some protection from the hottest afternoon sun. The exact amount of sunlight depends on the type of hydrangea, but in our Southern heat, a little afternoon shade can make a big difference.
The new location should also have soil that drains well. Hydrangeas enjoy consistent moisture, but they don’t want their roots sitting in soggy ground.
Before choosing the spot, ask yourself:
- How much sun does this area receive?
- Does water collect here after a heavy rain?
- Will the hydrangea have enough room at its mature size?
- Is it too close to the house, driveway, walkway, or another shrub?
- Will I be able to reach it easily for watering and pruning?
A five-gallon hydrangea may look small at the nursery, but many varieties can eventually grow six feet tall and just as wide. Give it enough room now so you don’t have to move it again later.
For a broader look at planting depth, drainage, and root preparation, see how to plant flowering shrubs in your landscape.
Water the Hydrangea Before Transplanting
Water the hydrangea deeply the day before you plan to move it.
Moist soil is easier to dig, and a well-hydrated plant is better prepared to handle the stress of transplanting.
You want the soil damp, not muddy. If the ground is soaking wet, it can become heavy and difficult to work with, and the root ball may fall apart while you’re trying to lift it.
Dig the New Hole First
Prepare the new planting hole before removing the hydrangea from its current location.
Dig the hole about twice as wide as the root ball but no deeper than the root ball itself.
The extra width gives the roots loose soil to grow into. The correct depth keeps the hydrangea from being planted too low.
Hydrangeas should generally be planted at the same depth they were growing before. Planting too deeply can lead to poor drainage, root problems, and slow growth.
If your soil is heavy clay, loosen the sides of the planting hole with your shovel. Smooth, compacted sides can act almost like a flowerpot and make it harder for roots and water to move into the surrounding soil.
How to Dig Up a Hydrangea
Start digging several inches or even a foot away from the base of the plant, depending on its size.
A larger hydrangea will have a wider root system, so give yourself plenty of room. It’s better to begin too far out than to start too close and cut through most of the roots.
Use a sharp shovel or spade to dig a circle around the plant. Push the shovel straight down, then work your way around the hydrangea.
Once you’ve cut around the outside, begin angling the shovel underneath the root ball.
Try to keep as much soil around the roots as possible. The more intact the root ball remains, the easier the move will be on the plant.
For a large hydrangea, you may need someone to help you lift it. These root balls can be much heavier than they look.
A tarp can also make the job easier. Slide the root ball onto the tarp and drag it carefully to the new location instead of carrying it across the yard.
Don’t lift the plant by pulling on the branches. Always support the root ball.
Should You Prune a Hydrangea Before Moving It?
You usually don’t need to heavily prune a hydrangea before transplanting it.
You can remove dead, damaged, or crossing branches, but avoid cutting the entire plant back unless there’s a good reason.
Remember that some hydrangeas bloom on old wood. Heavy pruning at the wrong time may remove next season’s flower buds.
If the plant is extremely large and difficult to move, you may need to reduce some of the top growth. Just understand that you could sacrifice some blooms, depending on the variety.
The most important thing is to avoid unnecessary stress. Digging up the roots is already a major change for the plant.
Place the Hydrangea in the New Hole
Set the hydrangea in the center of the prepared hole and check the depth before filling it in.
The top of the root ball should be level with, or just slightly above, the surrounding soil.
If the plant is sitting too low, lift it out and add some soil underneath. Don’t try to hold it up while packing loose soil beneath the roots.
Once the depth looks right, backfill the hole with the soil you removed.
There’s usually no need to fill the planting hole with rich potting soil or a large amount of compost. If the soil inside the hole is completely different from the native soil around it, the roots may stay inside that soft planting pocket instead of spreading outward.
You can mix in a modest amount of compost if your soil is especially poor, but the hydrangea still needs to adapt to the soil in your yard.
Gently firm the soil as you fill the hole, but don’t stomp it down. You want to remove large air pockets without compacting the soil around the roots.
Water Thoroughly After Planting
Water the hydrangea slowly and deeply immediately after transplanting.
This helps settle the soil around the roots and removes air pockets.
A slow trickle from the hose is usually better than blasting the area with a strong spray. Let the water soak into the entire root zone.
After the first watering, check the plant again. If the soil settles and exposes part of the root ball, add a little more soil.
For more help judging moisture correctly, read our guide to watering different types of plants the right way.
Add Mulch Around the Plant
Apply two to three inches of mulch around the base of the hydrangea.
Mulch helps hold moisture, regulate soil temperature, and reduce weeds while the plant is recovering.
Keep the mulch a few inches away from the main stems. Don’t pile it against the base of the plant like a mulch volcano.
That can trap too much moisture around the stems and encourage rot, insects, and disease problems.
How Often Should You Water a Transplanted Hydrangea?
A newly transplanted hydrangea needs consistent moisture while its roots become established.
For the first few weeks, check the soil regularly. Water when the top couple of inches begin to feel dry.
The exact schedule will depend on:
- Temperature
- Rainfall
- Soil type
- Sun exposure
- Plant size
Don’t rely on a strict schedule without checking the soil first.
Clay soil may stay wet much longer than sandy soil. A hydrangea planted in afternoon sun may dry out faster than one growing in filtered shade.
Water deeply enough to reach the entire root ball. A quick splash on the surface won’t do much good.
During warm weather, you may notice the leaves drooping in the afternoon. Hydrangeas often wilt temporarily during the hottest part of the day, even when the soil is moist.
Check the soil before watering again. If the plant perks back up in the evening, it may be reacting to heat rather than dry soil.
Should You Fertilize After Transplanting?
Don’t fertilize a hydrangea immediately after moving it.
Fertilizer encourages new top growth, but the plant needs to focus its energy on repairing and establishing roots.
For bigleaf hydrangeas, UGA Extension recommends waiting until the plant is established before fertilizing. In most cases, there’s no reason to rush. Water, mulch, and healthy root growth matter much more than fertilizer during the first few weeks after moving the plant.
A strong dose of fertilizer won’t help transplant shock. In some cases, it can make the problem worse.
Water, mulch, and patience are more important right now.
What Does Hydrangea Transplant Shock Look Like?
Even when you do everything correctly, a transplanted hydrangea may look unhappy for a while.
Common signs of transplant shock include:
- Wilting leaves
- Drooping stems
- Yellowing leaves
- Brown leaf edges
- Leaf drop
- Slower growth
- Fewer blooms
Some wilting is normal, especially if the plant was moved while it had leaves.
Keep the soil consistently moist, but don’t flood the plant. Too much water can damage stressed roots just as easily as too little water.
You can also compare these symptoms with our guide to why hydrangeas wilt and how to save them.
Resist the urge to fertilize, prune heavily, or move the plant again. Give it time to recover.
Can You Transplant a Large, Established Hydrangea?
Yes, but moving a mature hydrangea takes more effort.
The larger the plant, the larger and heavier the root ball will be. You may also lose more roots during the digging process.
For very large plants, you can root-prune ahead of time.
Root-pruning involves cutting a circle around the plant several weeks or months before you move it. This encourages the hydrangea to develop more feeder roots closer to the main plant.
When it’s time to transplant, the root ball will contain more of the small roots the plant needs to absorb water.
This extra step isn’t always necessary, but it can improve the chances of success with an older, established shrub.
Can You Divide a Hydrangea While Transplanting It?
Most shrub-type hydrangeas aren’t usually divided the same way you’d divide hostas, daylilies, or ornamental grasses.
You may notice separate rooted stems around the outside of an older plant, and some of those can occasionally be separated. However, cutting straight through the center of a woody hydrangea can cause serious damage.
If you want more plants, propagation through cuttings or layering is usually a safer option.
Will a Transplanted Hydrangea Bloom the Next Year?
It may, but don’t be surprised if flowering is lighter than usual.
Transplanting can interrupt bloom production, especially if:
- A large portion of the roots was lost
- The plant was moved during active growth
- The hydrangea was heavily pruned
- Flower buds were already forming
- The plant experienced heat or drought stress
A transplanted hydrangea may spend its first season rebuilding its root system instead of producing a large number of flowers.
That doesn’t mean the transplant failed. Healthy leaves and new growth are more important than blooms during the first year.
Common Hydrangea Transplanting Mistakes
A few mistakes can make transplanting much harder on the plant.
Moving It During Extreme Heat
Hot weather increases moisture loss and makes transplant shock more likely.
Planting It Too Deeply
The top of the root ball should remain level with the surrounding soil.
Letting the Root Ball Dry Out
Move the plant promptly and water it as soon as it’s planted.
Cutting Away Too Many Roots
Start digging far enough from the plant to preserve a good-sized root ball.
Overwatering
Keep the soil moist, but don’t leave the roots sitting in water.
Fertilizing Immediately
Let the roots recover before encouraging new growth.
Choosing Another Poor Location
Check sunlight, drainage, and mature size before planting.
What We Have Learned When Moving Hydrangeas
At Bobby & Lynn’s Plant Farm, we’ve found that hydrangeas usually recover best when they’re moved during cool weather and as much of the root ball as possible stays intact.
The biggest problems usually come from moving them during extreme heat, allowing the root ball to dry out, planting too deeply, or watering again before checking whether the soil is still wet.
A transplanted hydrangea may look rough for a while, but temporary wilting or reduced flowering does not always mean the move failed. Healthy roots and steady recovery matter more than blooms during the first season.
Final Thoughts
Transplanting a hydrangea may look like a big job, especially when you’re standing there with a shovel wondering just how far those roots go.
But hydrangeas are tougher than people sometimes give them credit for.
Choose a cool time of year, prepare the new spot first, preserve as much of the root ball as possible, and keep the plant watered while it settles in.
It may droop. It may drop a few leaves. It may even skip a season of heavy blooming.
Give it time.
Once the roots become established, your hydrangea should begin growing into its new space—and hopefully this time, it’ll be in a spot where it can stay for a good long while.
Need More Hydrangea Help?
Still have questions about your hydrangea? Visit our Hydrangea Help page for practical guides on pruning, watering, fertilizing, blooming problems, brown leaves, drooping flowers, and more.
Whether you’re trying to identify your hydrangea or figure out why it isn’t blooming, we’ll help you find the right information without making things more complicated than they need to be.