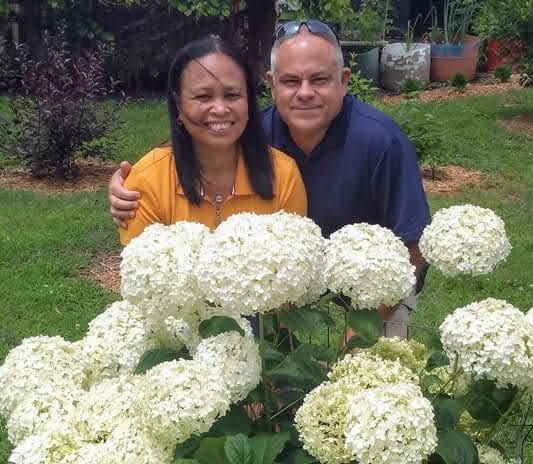
As summer begins to wind down, many gardeners wonder how they should prepare hydrangeas for fall. The good news is that hydrangeas usually don’t need a complicated fall routine. A little cleanup, steady watering, fresh mulch, and restraint with the pruners can help your plants enter winter healthy and ready for another beautiful growing season.
Here in Georgia, fall weather can be unpredictable. One week may feel cool and comfortable, while the next brings dry soil and temperatures that feel more like summer. Preparing your hydrangeas properly helps protect their roots, preserve next year’s flower buds, and prevent common problems from carrying into spring.
Quick Answer: How Should You Prepare Hydrangeas for Fall?
To prepare hydrangeas for fall, follow these basic steps:
- Continue watering during dry weather.
- Remove fallen leaves that show signs of disease.
- Refresh the mulch around the root zone.
- Avoid heavy pruning.
- Stop fertilizing late in the season.
- Inspect the plant for damaged or diseased branches.
- Protect newly planted or container-grown hydrangeas when severe cold is expected.
The most important thing to remember is simple: fall is usually a time to protect and maintain hydrangeas—not reshape them.
Fall Is a Time to Slow Down
Not Sure What Your Hydrangea Needs This Fall?
Fall hydrangea care is often more about what not to do. Late fertilizer, unnecessary pruning, dry soil, and cutting stems on old-wood bloomers can all affect the plant heading into winter. If something looks wrong or you are unsure whether to prune, water, or leave it alone, our Hydrangea Help Center can help you work through the clues.
About Bobby & Lynn

Fall Hydrangea Care at a Glance
| Fall Task | What You Should Do | What You Should Avoid |
|---|---|---|
| Watering | Water deeply when the soil becomes dry | Frequent shallow watering |
| Mulching | Maintain a 2- to 4-inch layer | Piling mulch against the stems |
| Pruning | Remove clearly dead or damaged wood | Cutting the entire shrub back |
| Fertilizing | Allow the plant to begin dormancy | Applying high-nitrogen fertilizer |
| Cleanup | Remove diseased fallen leaves | Leaving infected debris under the shrub |
| Winter protection | Protect young or exposed plants as needed | Wrapping every established hydrangea unnecessarily |

Keep Watering During Dry Fall Weather
One of the most important ways to prepare hydrangeas for fall is to make sure they don’t enter winter already stressed from a lack of water.
Cooler temperatures reduce water loss, but they don’t automatically mean the soil is moist. Georgia can experience long dry stretches during September, October, and even November. A hydrangea may be losing its leaves while its roots still need moisture.
Check the soil several inches below the surface. When it feels dry, water slowly and deeply around the plant’s root zone. Deep watering encourages moisture to move farther into the soil, where the roots can use it.
Avoid giving the plant a small splash every day. Frequent shallow watering keeps moisture near the surface and may encourage a weaker, shallower root system.
Newly planted hydrangeas need particularly close attention. Their roots haven’t spread into the surrounding soil yet, so they can dry out faster than established shrubs.
For more help with year-round watering and care, read our Hydrangea Care Guide: Better Blooms Made Easy.
Refresh the Mulch Around Your Hydrangeas
A fresh layer of mulch is one of the easiest and most effective ways to prepare hydrangeas for fall.
Mulch helps:
- Hold moisture in the soil.
- Reduce sudden soil-temperature changes.
- Protect shallow roots.
- Suppress cool-season weeds.
- Reduce soil splashing onto the leaves.
Apply approximately 2 to 4 inches of pine straw, shredded bark, or another organic mulch over the root zone. Extend it outward beneath the plant’s canopy when possible.
Leave a few inches of open space around the main stems. Mulch piled directly against the plant can hold too much moisture around the bark and may contribute to decay.
The University of Georgia Cooperative Extension also recommends organic mulch for bigleaf hydrangeas to conserve moisture and help control weeds. You can learn more in its guide to growing bigleaf hydrangeas.
Don’t Prune Hydrangeas Heavily in Fall
The biggest fall hydrangea mistake we see is unnecessary pruning.
Many gardeners assume that a shrub should be cut back as soon as its leaves begin turning brown. That may work for certain perennials, but hydrangeas are different.
Bigleaf and oakleaf hydrangeas generally produce flowers on older stems. Their flower buds may already be present by fall. Cutting those stems back can remove the buds that would have produced next year’s blooms.
Panicle and smooth hydrangeas bloom on new growth and are more forgiving. Even so, there’s usually no benefit to cutting them back in fall. Late-winter or early-spring pruning allows you to see which stems survived winter and gives the plant a cleaner start.
What Can You Remove in Fall?
You may remove:
- Branches that are clearly broken.
- Wood that is unquestionably dead.
- Diseased stems that need to be discarded.
- Branches creating an immediate safety problem.
Avoid general shaping, thinning, or reducing the plant’s size unless you know exactly which type of hydrangea you have and when it forms its flower buds.
Our guide to deadheading hydrangeas explains why it’s wise to become more cautious with cutting as the growing season comes to an end.
Should You Remove the Brown Hydrangea Flowers?
Removing old blooms in fall is optional.
Some gardeners prefer a neat appearance and carefully remove the faded flower heads. Others leave them through winter for added texture and interest in the landscape.
Leaving the blooms won’t hurt the plant. Frost-covered hydrangea flowers can also look beautiful during winter.
When you do remove a flower head, make a shallow cut directly beneath the bloom. Don’t continue down the stem unless you know the shrub blooms on new wood. Cutting too far down a bigleaf or oakleaf hydrangea may remove next season’s flower buds.
Clean Up Diseased Leaves
Healthy fallen leaves can break down naturally or become part of the surrounding mulch. Leaves affected by disease should be handled differently.
If your hydrangea experienced leaf spot, mildew, or another recurring foliage problem, collect the affected leaves after they fall. Remove them from the planting area instead of allowing them to remain directly beneath the shrub.
This cleanup won’t guarantee that the problem disappears, but it can reduce the amount of infected plant material sitting around the base of the plant.
Don’t compost noticeably diseased leaves unless your compost pile becomes hot enough to destroy disease-causing organisms. Disposing of them away from the hydrangea bed is often the simpler choice.
Healthy leaves may remain temporarily, but thick, wet mats of whole leaves can limit airflow and hold excessive moisture. Shredding them allows them to break down faster and creates a more useful mulch.
Stop Fertilizing Hydrangeas Late in the Season
Fall isn’t the time to push hydrangeas into producing tender new growth.
Late applications of high-nitrogen fertilizer may encourage fresh stems and leaves when the plant should be slowing down and preparing for dormancy. That soft growth may be more vulnerable when cold weather arrives.
In most Georgia landscapes, routine hydrangea fertilization should be completed earlier in the growing season. By fall, allow the plant to harden naturally.
Don’t add fertilizer simply because the leaves are changing color or dropping. That seasonal change is normal for deciduous hydrangeas.
A soil test is the best way to determine whether your planting bed actually needs nutrients or a pH adjustment. Guessing can waste money and may create additional plant problems.
Check the Plant Before the Leaves Fall
Fall is a good time to take a close look at the condition of your hydrangea.
Check for:
- Split or damaged branches.
- Bark damage near the bottom of the plant.
- Stems rubbing against one another.
- Signs of insects or disease.
- Exposed roots.
- Soil that remains soggy long after rain.
- Mulch piled against the stems.
- Leaning or unstable newly planted shrubs.
You don’t have to correct every cosmetic issue immediately. The goal is to identify problems that may become worse over winter.
Constantly soggy soil deserves special attention. Hydrangeas like consistent moisture, but their roots still need oxygen. Poorly drained soil can create serious root problems, especially during cooler months when water evaporates more slowly.
Protect Newly Planted Hydrangeas
Established hydrangeas growing in an appropriate location usually handle a normal Georgia winter without elaborate protection. Newly planted hydrangeas may need a little more attention.
Make sure the root ball remains evenly moist through fall. Refresh the mulch before freezing temperatures arrive, but keep it away from the stems.
Plants installed late in the season may not have enough time to develop a wide root system. Mulch helps reduce temperature swings while those roots continue becoming established.
During an unusually severe cold spell, a young bigleaf hydrangea in an exposed location may benefit from temporary frost cloth. Cover the plant before temperatures fall and secure the cloth near the ground. Remove or open the covering when conditions improve.
Avoid using plastic directly against the foliage. Plastic offers limited insulation and can trap condensation against the plant.
Give Container Hydrangeas Extra Protection
Hydrangeas growing in containers are more exposed to cold than plants growing in the ground. The soil inside a pot can freeze faster because cold air reaches it from several sides.
To prepare container hydrangeas for fall, move the pot to a protected location near the house, inside an unheated garage, or in another sheltered area once the plant becomes dormant.
Continue checking the soil occasionally. Dormant hydrangeas use less water, but the roots shouldn’t remain completely dry for extended periods.
Large containers provide better insulation than small pots. You can also group several containers together and surround them with leaves, pine straw, or another insulating material.
Make sure every container drains properly. Cold, waterlogged potting soil can be especially damaging to hydrangea roots.
Leave Healthy Stems Standing Through Winter
Bare hydrangea stems may look lifeless during winter, but appearance alone doesn’t mean they’re dead.
Avoid cutting a stem just because it has lost its leaves. Hydrangeas are deciduous shrubs, so leaf loss is part of their normal seasonal cycle.
Waiting until late winter or spring makes it easier to determine what survived. Healthy buds may begin swelling along living stems as the weather warms.
Old stems may also provide a small amount of protection for lower buds. This can be helpful with bigleaf hydrangeas, especially following sudden temperature drops.
What We See at Our Plant Farm
In our Zone 8a growing conditions around Dallas, Georgia, we deal with hot late summers, stretches of dry fall weather, and Georgia red clay that can hold moisture differently from lighter soils. We’ve found that checking the soil before watering is more reliable than following a calendar. Some hydrangeas may need additional water well into fall, while others growing in heavier soil may stay moist much longer.
Quick Fall Hydrangea Checklist
Use this checklist as cooler weather arrives:
- Check the soil for dryness.
- Water deeply during extended dry periods.
- Refresh mulch to a depth of 2 to 4 inches.
- Pull mulch away from the main stems.
- Remove leaves affected by disease.
- Leave healthy stems in place.
- Avoid heavy pruning.
- Stop late-season fertilizing.
- Inspect containers for proper drainage.
- Protect young or exposed plants during severe cold.
Frequently Asked Questions About Fall Hydrangea Care
Should hydrangeas be cut back in the fall?
Most hydrangeas shouldn’t be cut back in fall. Bigleaf and oakleaf hydrangeas can carry next year’s flower buds on older stems. Cutting them back may remove those buds. Panicle and smooth hydrangeas can usually be pruned in late winter or early spring.
If you’re not sure what type of hydrangea you have, first learn whether it blooms on old wood or new wood. That one detail can determine whether fall pruning removes next year’s flower buds. See our guide to Old Wood vs New Wood Hydrangeas: What You Need to Know before making any major cuts.
Should I remove all the leaves from under my hydrangeas?
Remove leaves showing signs of disease. Healthy leaves can be shredded and used as mulch, but avoid leaving a thick, wet mat beneath the shrub.
Do hydrangeas need fertilizer in the fall?
Hydrangeas generally don’t need fall fertilizer. Late feeding can encourage tender growth instead of allowing the plant to enter dormancy naturally.
Should I water hydrangeas after their leaves begin falling?
Yes, when the soil is dry. Roots remain alive and may continue absorbing moisture even after the plant begins losing its leaves.
Do I need to cover hydrangeas every winter?
Most established hydrangeas in Georgia don’t need to be covered throughout winter. Temporary protection may help young, container-grown, or exposed bigleaf hydrangeas during unusually severe freezes.
Are brown hydrangea blooms a sign that the plant is dying?
No. Flowers naturally fade and turn brown as the season ends. Hydrangeas also lose their leaves and become dormant during winter.
What to Do Next
When you prepare hydrangeas for fall, keep the process simple. Maintain adequate moisture, refresh the mulch, clean up diseased debris, and resist the temptation to prune healthy stems.
Fall care can’t control every winter temperature swing, but it can help your hydrangeas enter dormancy without unnecessary stress. Once spring returns, you’ll be in a much better position to evaluate the plant, remove any winter damage, and prepare for another season of growth and flowers.
For more practical advice suited to Southern gardens, visit our complete guide to growing hydrangeas in Georgia.
You can also explore our Hydrangea Help and free garden resources for easy-to-follow pruning, watering, planting, and troubleshooting guides from Bobby & Lynn’s Plant Farm.