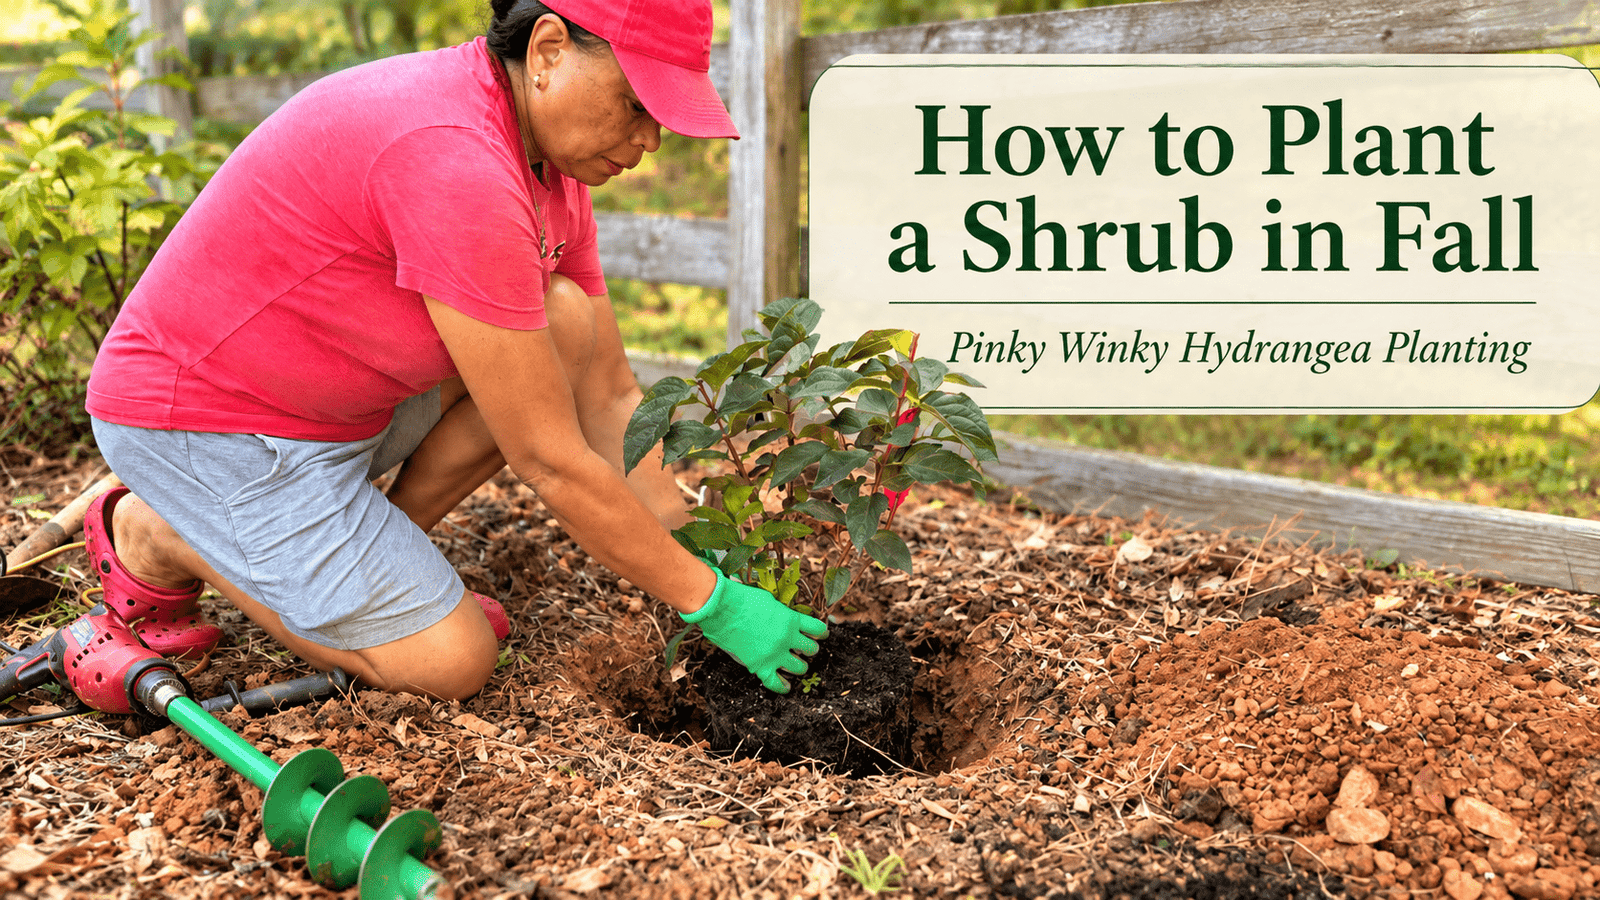
If you want to plant a shrub in fall, the most important thing is to get the planting depth, spacing, watering, and mulch right from the beginning. Planting a shrub correctly from the beginning can make a big difference in how quickly it settles in and how well it handles its first summer. We recently planted four Pinky Winky panicle hydrangeas here at Bobby & Lynn’s Plant Farm in Dallas, Georgia, and photographed the entire process—from measuring and digging through watering and mulching.
We also purposely waited until fall to plant them. In our experience, fall is one of the best times to establish shrubs because cooler weather gives the roots time to grow without fighting the heat and water demands of summer.
Quick Answer
The best way to plant a shrub in fall is to choose the right location first, allow enough room for its mature size, dig a hole no deeper than the root ball and considerably wider, water thoroughly after planting, and finish with mulch to help conserve moisture.
Fall is especially helpful because cooler temperatures reduce stress while the soil remains warm enough for continued root development. Here in Georgia, we prefer fall planting whenever practical because it gives many shrubs several months to establish before our summer heat arrives.
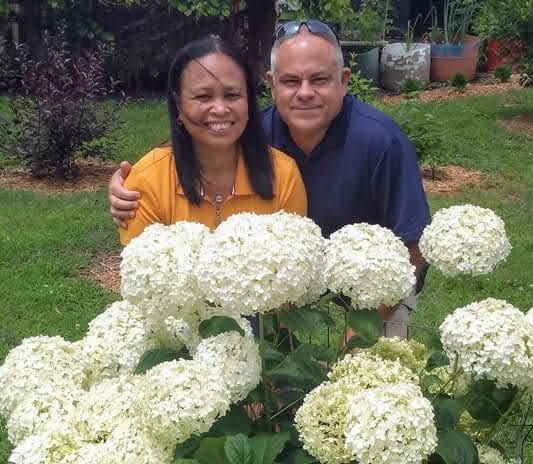
About Bobby & Lynn

Why We Think Fall Is the Best Time to Plant Shrubs
We sell plenty of plants in spring, but when we’re planting shrubs for our own landscape, fall is hard to beat.
The biggest reason is simple: the plant does not have to establish itself while fighting summer heat at the same time.
A newly planted shrub has a limited root system. During hot weather, those roots have to supply water to a full canopy of leaves while also trying to grow into the surrounding soil.
If you plant a shrub in fall that changes that equation.
Temperatures begin cooling, evaporation decreases, and the plant can put more energy into establishing roots. Even after top growth slows or goes dormant, root development can continue while soil temperatures remain suitable.
University of Georgia Cooperative Extension also recommends fall and winter planting for many woody ornamentals because plants experience less stress and have an opportunity to establish stronger root systems before the following growing season.
University of Georgia Cooperative Extension — Best Management Practices in the Landscape
For us in Georgia, there is another major advantage. A shrub planted in September, October, or later in the fall can have months to settle in before it faces its first June, July, and August.
That head start matters.
What We Planted
For this project, we planted four Pinky Winky panicle hydrangeas.
We weren’t planting them simply as individual specimen plants. We wanted them to eventually form a flowering privacy screen.
That changed how we approached the spacing.
Pinky Winky is not a small hydrangea. Proven Winners currently lists the original Pinky Winky at approximately 6 to 8 feet tall and 6 to 8 feet wide at maturity. Different cultivars—including Pinky Winky Prime—can grow even larger, so always check the plant tag for the exact variety you purchase.
Our goal was for these hydrangeas to eventually grow together without packing them so tightly that they immediately compete for space.
Before You Plant A Shrub In Fall Measure Before You Dig
One of the easiest planting mistakes to make happens before the shovel ever touches the ground.
People look at the shrub sitting in its nursery container.
It looks small.
So they plant another one three feet away.
A few years later, both plants are fighting for the same space.
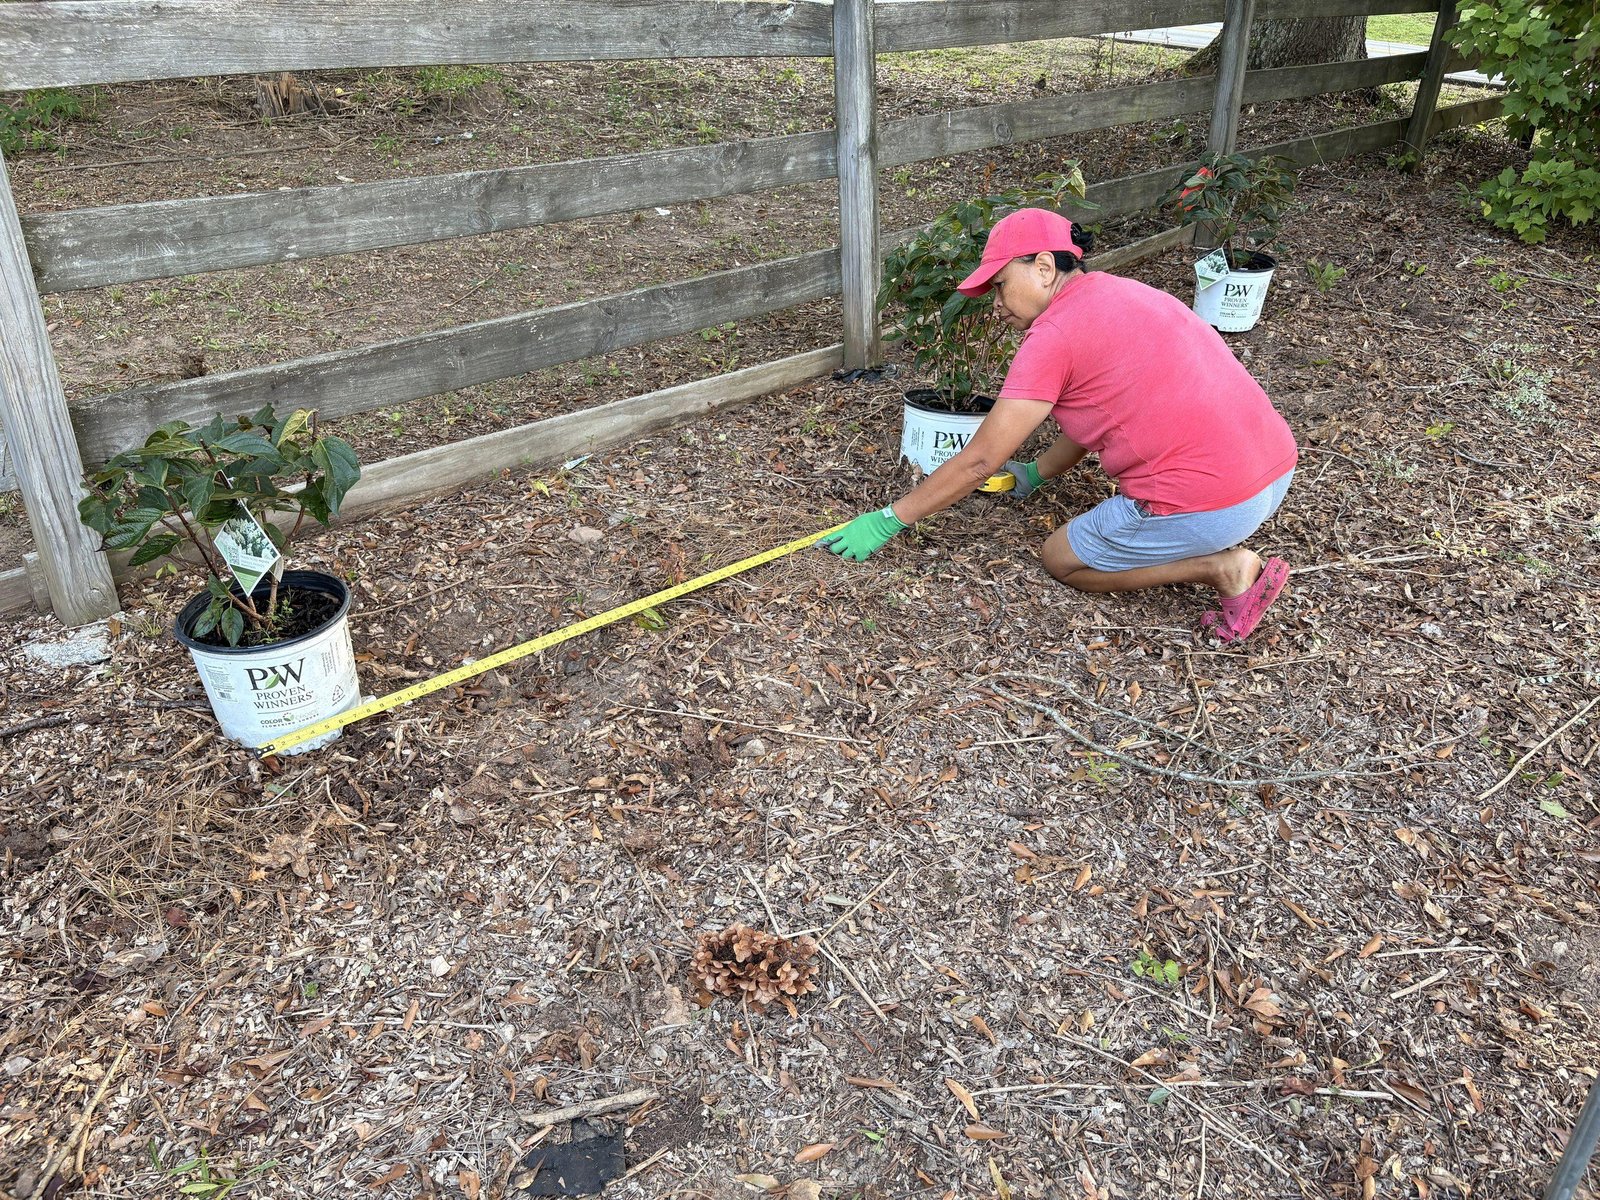
Before planting our Pinky Winky hydrangeas, Lynn measured the entire area and marked the locations approximately six feet apart.
Because we’re using them for privacy, we actually want the plants to eventually meet and create a fuller screen. We just don’t want them planted so close together that they become overcrowded unnecessarily.
If we were growing these as individual specimen plants where we wanted to see the complete natural shape of each shrub, we might allow more room.
That’s why there isn’t one spacing number that works for every landscape.
Think about:
- The mature width of the shrub
- Whether you want individual plants or a continuous hedge
- Nearby structures
- Walkways and driveways
- Other established plants
- Sun exposure
- Air movement
Our free Garden Help by Bobby & Lynn app also includes plant spacing and selection tools that can help you think through these measurements before planting.
How We Dug the Planting Hole
We use an auger for a lot of planting around the farm because we plant more shrubs than the average homeowner.
But we don’t simply drill a hole and drop the plant into it.
Our Georgia red clay is the reason.
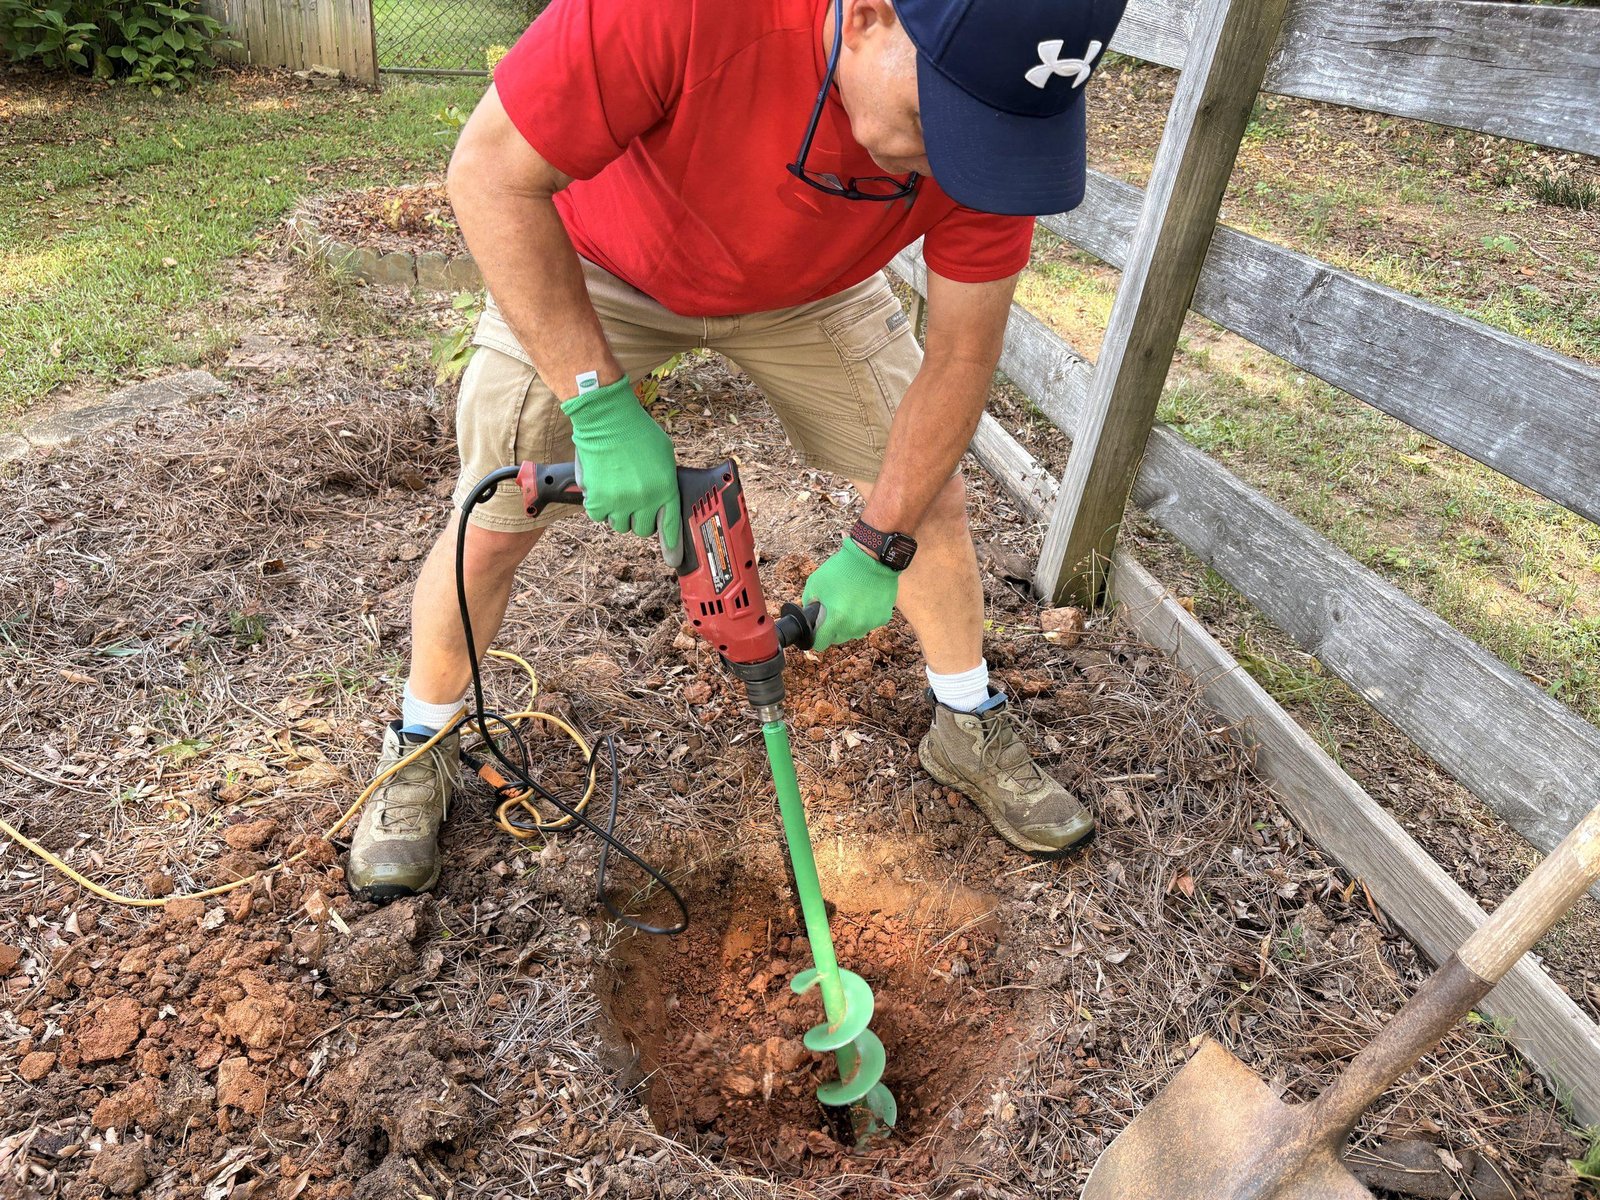
After using the auger, we finish shaping the hole with a shovel.
That allows us to check the width, depth, and sides of the planting hole instead of relying entirely on the auger.
Get the Planting Depth Right
One of the most important things we check is depth.
A shrub should not be planted substantially deeper than it was growing in the container.
Digging too deep and then filling the bottom with loose soil can also cause the shrub to settle after watering.
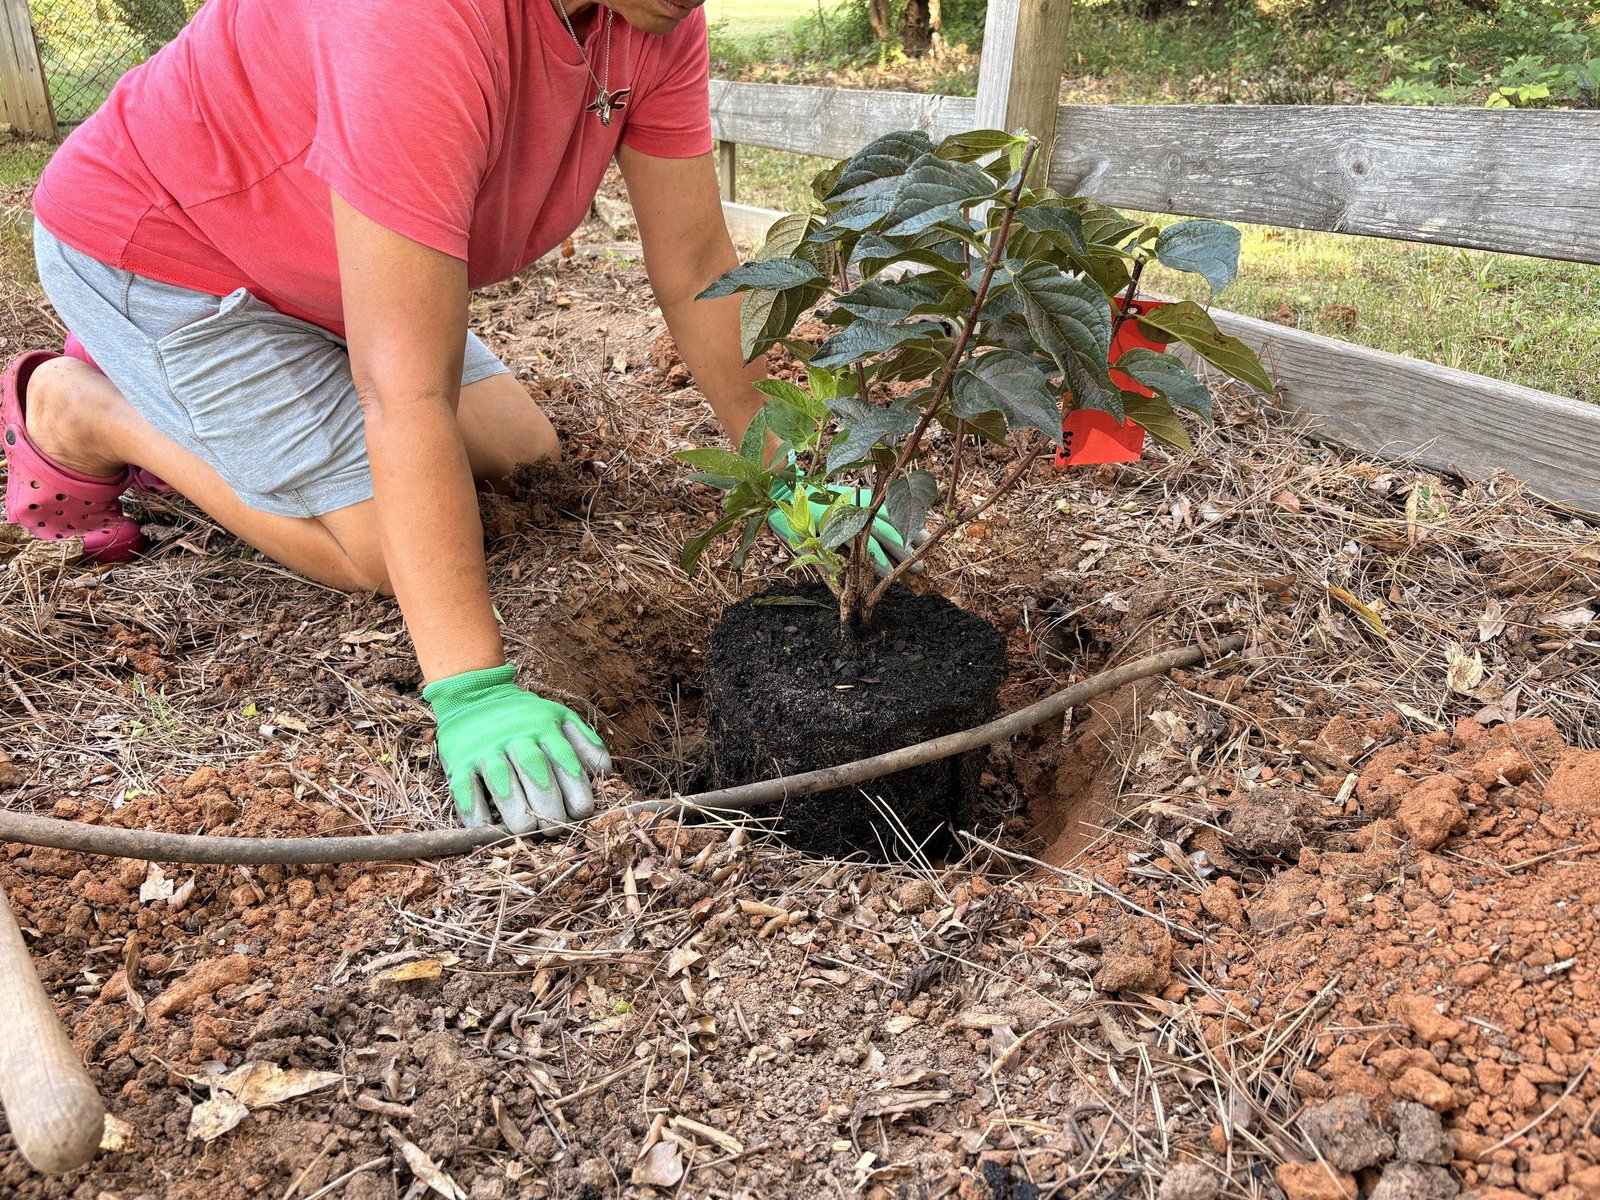
Instead, we want the root ball sitting on firm soil, and we like to plant where the root ball is slightly above grade.
We place the hydrangea into the hole before completely backfilling it and check the height from several angles.
The top of the root ball should generally be even with—or in heavy soils, sometimes slightly above—the surrounding grade rather than buried several inches below it.
This is particularly important for us because we’re planting in dense red clay.
Why We Added Pine Fines to Our Red Clay
This is one of those areas where we think it’s important to explain what we actually do rather than turn our method into a universal rule.
Our native soil is heavy Georgia red clay.
For these hydrangeas, we incorporated a modest amount of pine fines with the native soil as we backfilled. We’re not replacing all of the native soil or creating a hole filled entirely with potting mix.
Our goal is simply to improve the physical texture around the newly establishing root system and help create a little more pore space in soil that can otherwise become extremely dense.
Most of the backfill is still the soil that came out of the hole.
That’s important because ultimately the roots have to grow beyond the planting hole and live in the native soil surrounding them.
Your soil may be completely different.
Someone gardening in sandy Florida soil, rich Midwest loam, or rocky mountain soil shouldn’t automatically copy what we do with Georgia clay.
This is where knowing your own soil matters.
If you’re unsure what you have, a soil test through your local Extension office is one of the best places to start.
Backfill Without Packing the Soil Like Concrete
Once we’re happy with the depth, we begin returning soil around the root ball.
We gently firm the soil enough to eliminate major air pockets, but we aren’t stomping it down until it’s compacted.
Roots need both water and oxygen.
That’s particularly important in clay soil, where compaction can already be a challenge.
We gradually work around the root ball until the surrounding soil is back near the original grade.
If you Plant a Shrub in Fall be Sure to Water the Shrub in Thoroughly
The shrub gets watered immediately after planting.
This isn’t just about giving the plant a drink.
Watering also helps settle soil around the root ball and closes some of the larger air pockets that may remain after backfilling.
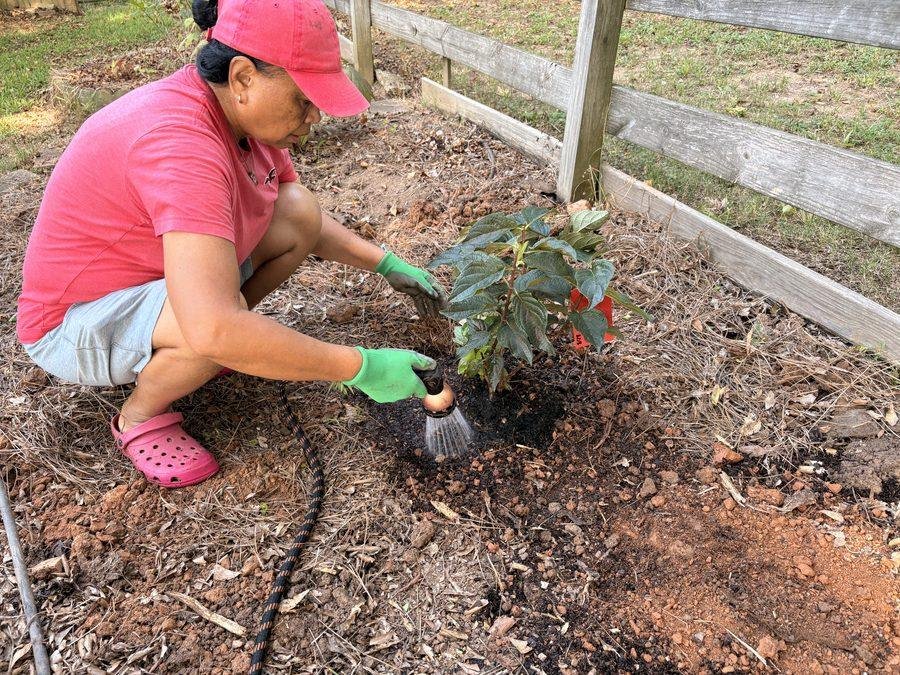
One mistake we see people make is assuming that because temperatures are cooler in fall, newly planted shrubs don’t need water.
They do.
Fall planting usually reduces how frequently we need to water compared with summer, but these plants are still establishing.
We check the soil rather than watering strictly by the calendar.
If rainfall is limited, newly planted shrubs still need supplemental water.
The goal is consistently moist soil during establishment—not constantly saturated soil.
Why We Use Pine Straw Around New Shrubs
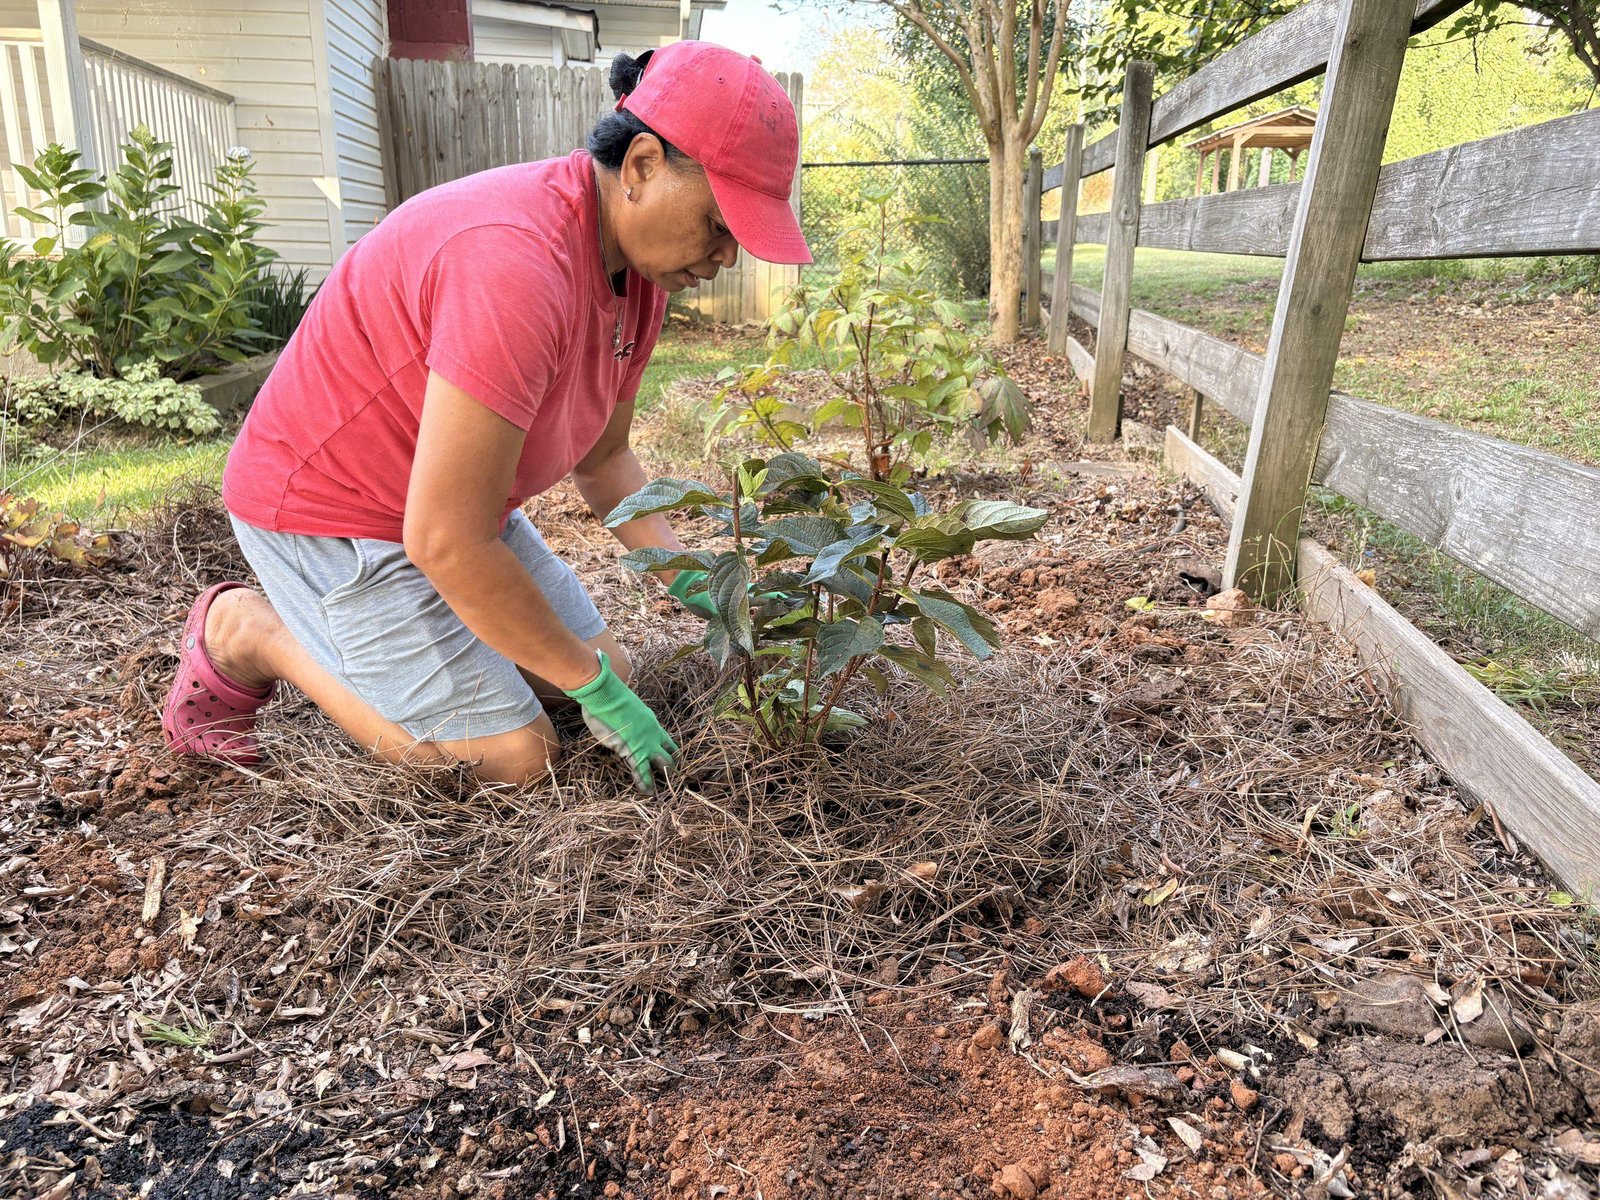
After planting and watering, we mulch.
Around our farm, that usually means pine straw.
There’s a practical reason.
We have a lot of landscape beds.
Pine straw is readily available in our area, economical for the amount of ground we cover, easy to spread, and effective at helping reduce moisture loss from the soil.
There is another thing we like about pine straw.
It makes it easy to keep the mulch relatively loose around the plant instead of building a thick mound directly against the stems.
You’ve probably seen what is sometimes called a mulch volcano around trees and shrubs—a large mound of mulch piled against the trunk or base.
We don’t want that.
Mulch belongs over the root zone, not piled tightly around the stems.
We leave a little breathing room immediately around the plant and spread the pine straw outward instead.
What We Observed While Planting
This planting was a good reminder that the actual digging is only one piece of planting a shrub properly.
Most of the important decisions happened before and during the planting:
We determined the purpose of the plants first.
In this case, privacy.
Then we considered mature size.
Lynn measured the spacing before we dug anything.
We checked the planting depth instead of assuming the hole was correct.
We worked with the red clay we actually have instead of pretending we have perfect garden soil.
We watered each shrub thoroughly after planting.
Finally, we protected the root area with pine straw.
None of those individual steps is particularly complicated.
Together, though, they give the shrubs a much better start.
Why We Didn’t Fertilize the New Hydrangeas
You’ll notice something we didn’t add during this planting: fertilizer.
That’s intentional.
Our goal right now isn’t to push a bunch of tender new top growth heading into fall and winter. We want the plants concentrating on becoming established.
We normally handle our flowering-shrub fertilizing according to the growing season rather than assuming every newly planted shrub needs fertilizer dropped into the planting hole.
You can read more in our guide to the best time to fertilize flowering shrubs for better blooms.
How Fall Planting Changes in Different Regions
Although we prefer fall planting here in north Georgia, gardening advice always needs some regional context.
In much of the Southeast and other moderate climates, fall can provide a long establishment period before summer.
Farther north, gardeners need to consider how much time remains before the ground freezes.
In very cold climates, planting earlier in fall gives roots more opportunity to establish before winter conditions arrive.
In extremely hot climates, waiting until temperatures moderate can reduce transplant stress.
The principle is more important than a particular calendar date:
Give the shrub time to establish when the weather places the least stress on it.
Your local Cooperative Extension office can provide planting recommendations based on your region.
What Happens Next With Our Pinky Winky Hydrangeas
These four plants are now part of a long-term project here at the farm.
And that’s actually what makes this planting more useful for us—and hopefully for you.
We’re not finished documenting them just because they’re in the ground.
We’ll be able to watch:
- How quickly they establish
- How much growth they produce next season
- When they begin filling the six-foot spaces
- How they respond to our Georgia summer
- How frequently they need supplemental water
- How the plants eventually perform as a privacy screen
We’ll continue photographing them as they grow.
That gives us something better than simply repeating a planting recommendation: we’ll be able to show you what actually happened.
A Simple Shrub Planting Checklist
Before planting your next shrub, make sure you have:
- Checked its mature height and width
- Determined the amount of sunlight the location receives
- Checked drainage
- Measured the spacing
- Dug the hole wide enough
- Avoided planting the root ball too deeply
- Used the native soil appropriately when backfilling
- Watered thoroughly after planting
- Added mulch for moisture conservation
- Kept mulch away from the stems
- Planned to monitor moisture while the shrub establishes
Our Flowering Shrubs guides include additional help with choosing, planting, pruning, and caring for shrubs throughout the year.
Frequently Asked Questions
Is fall really the best time to plant shrubs?
For many woody shrubs, yes. Cooler temperatures generally reduce transplant stress while roots can continue developing in soil that remains warm enough for growth. Fall-planted shrubs can then enter spring with a more established root system.
How deep should I plant a shrub?
The root ball generally should not be buried substantially below the surrounding soil. We check that the top of the root ball is around surrounding grade and are particularly careful about planting too deeply in our heavy clay soil.
Should I amend clay soil when planting shrubs?
It depends on the soil and the plant. We used a modest amount of pine fines mixed with our native red clay for this planting, but most of our backfill remained native soil. Avoid creating a completely different pocket of soil that the roots eventually have to leave.
How far apart should Pinky Winky hydrangeas be planted?
The original Pinky Winky panicle hydrangea is generally listed at approximately 6 to 8 feet wide at maturity. We planted ours about six feet apart because we’re intentionally creating a privacy screen and want them to eventually grow together. Give them more room if you want each plant to maintain a completely separate form.
Always check the mature dimensions listed for your exact cultivar.
Should I fertilize a shrub when I plant it in fall?
We didn’t fertilize these hydrangeas at planting. Our priority during fall establishment is root development rather than encouraging unnecessary tender top growth. Fertilizer needs also depend on your soil and the particular plant.
Does a newly planted shrub need water during fall?
Absolutely. Cooler weather can reduce water demand, but a newly planted shrub still has a limited root system. Check the root zone regularly and provide supplemental water whenever rainfall isn’t keeping it adequately moist.
What is the best mulch for newly planted shrubs?
There isn’t one mulch everyone has to use. We use pine straw because it is economical for the large areas we maintain, easy for us to obtain, and effective at conserving soil moisture. Shredded bark, wood mulch, and other organic materials can also work well when used correctly.
Credible Sources
Our planting methods in this article are based primarily on what we actually did and observed at Bobby & Lynn’s Plant Farm in Dallas, Georgia.
For additional research-based planting guidance, we recommend the University of Georgia Cooperative Extension’s ornamental planting and landscape publications, particularly its recommendations on fall planting, planting-hole preparation, soil conditions, watering, and mulching.
Plant-specific mature dimensions should always be confirmed using the grower’s information or the tag supplied with the plant. For the Pinky Winky hydrangeas shown here, Proven Winners’ Pinky Winky plant information provides current mature-size and growing information.
Affiliate Disclosure: This post may contain affiliate links. If you purchase through one of these links, we may earn a small commission at no extra cost to you. We only recommend tools and products we use or believe are useful for gardeners.
Tools We Used for This Planting
Shovel — for shaping the planting hole and backfilling around the root ball.
Auger — for speeding up digging and loosening the planting area.
Drill — to power the auger.
Tape measure — for checking spacing and planting dimensions.
Hori hori knife — for gently loosening and scoring the outer roots of the root ball before placing the shrub in the hole.
Gorilla Cart — used to move soil, mulch, tools, and other planting materials around the planting area.
Discover more from Bobby and Lynn’s Plant Farm
Subscribe to get the latest posts sent to your email.